tempering chocolate: the seeding method;

Tempering chocolate is the process of heating and cooling chocolate to form perfectly crystallized, stable chocolate. This gives a smooth and glossy finish, keeps it from easily melting in your hand, and is mostly used for making candy and chocolate covered treats. Have you ever held chocolate and realized that it starts melting from the heat of your hand? Have you ever picked up a truffle or bonbon in that same hand and wondered why it doesn’t melt nearly so fast? The answer is tempering chocolate.
Tempering chocolate is not for the faint-hearted. Chocolate is a fickle beast that takes time, patience, and a lot of practice. But my goodness, the result is delicious and so worth it! If you’re looking for fast and easy, skip tempering chocolate and try compound chocolate instead. Still a delicious option, you just melt and go for delicious beautiful results. Check out this post to learn more about compound chocolates and all the truffles you can make with it!
But if you’re dedicated to learning the art of tempering chocolate, then keep on reading. I’ll outline all the equipment you need, the process itself, troubleshooting tips, and cleaning instructions. So let’s get started!
equipment;
- Instant read thermometer (required) – this is a non-negotiable must if you’re trying to temper your own chocolate. There are plenty of brands out there, but I recommend Thermoworks. It’s the brand I see time and time again recommended by professionals. They have some various options and can get expensive. The thermapen is a go-to classic, but I have the more affordable thermopop and think it’s a great option for the price. Another option is the chef alarm if you want a built in min/max temperature alarm and/or would also like to use it and leave it in the oven.
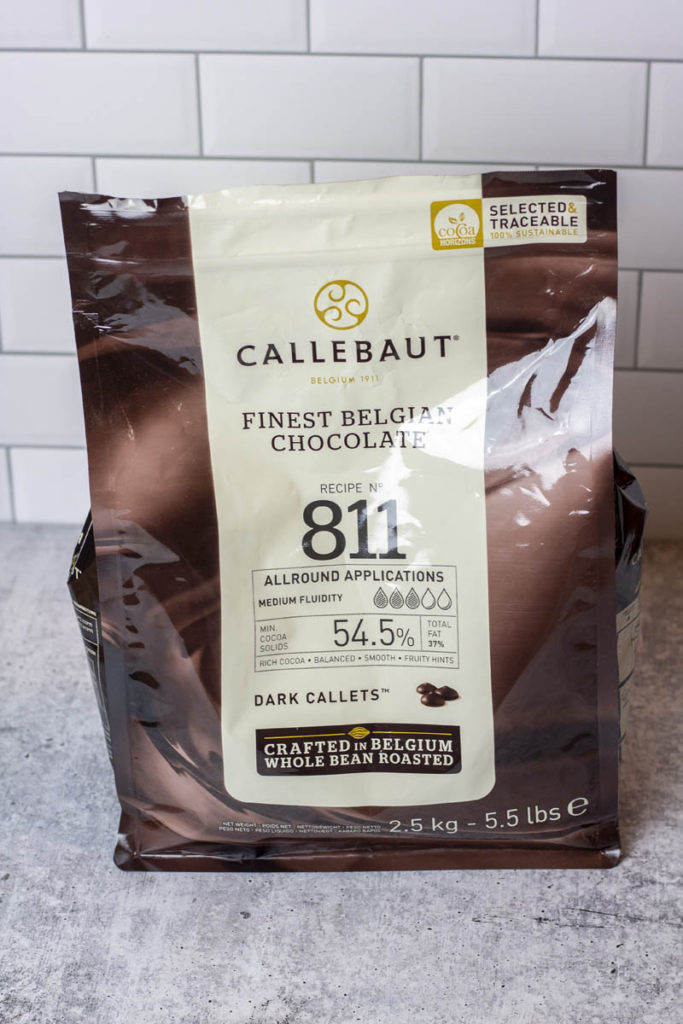
- Couverture chocolate (required) – The important word here is couverture. Your run-of-the-mill chocolate chips are not going to do it here. So what is couverture chocolate? In short, it’s a high quality chocolate, typically ground finer than other chocolate products, and contains a greater percentage of cocoa butter. So far I use Callebaut. They’re great for the seeding method and reasonably priced. I get mine from world wide chocolate, and have been very happy with their free, fast shipping and availability of products. They do a good job of giving you details, but it can be immensely overwhelming, so for quick reference, I suggest 811 Dark Chocolate. Thusfar I’ve only worked with dark chocolate, but if you’re looking for milk or white, I would purchase these White Chocolate Callets and the 823 Milk Chocolate.
(list continued below)
- Microwave (required) – You’ll need to heat and cool your chocolate, and a microwave is the best and easiest option in my opinion. You could technically use a double boiler or other heating methods, but I prefer the microwave so that’s what we’ll focus on here.
- Plastic, microwaveable bowl (required) – maybe surprisingly, plastic is the best option. Glass and ceramic bowls can retain too much heat or heat unevenly and temperature is so key in tempering chocolate. Don’t use a metal mixing bowl and blow up your microwave and/or house. I shouldn’t have to tell you that. Considering plastic bowls are so cheap, I just bought a set specifically for chocolate, so I can wash it without soap and don’t have to worry about residue from other food. (See the cleaning section for more details.)
- Spatula (required) – I really like these seamless silicone spatulas. Easy to clean, and the heads don’t fall off or retain residue in multiple uses. Really you just need something to stir with that won’t affect temperature. E.g. I wouldn’t recommend a metal spoon.
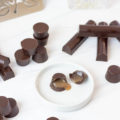
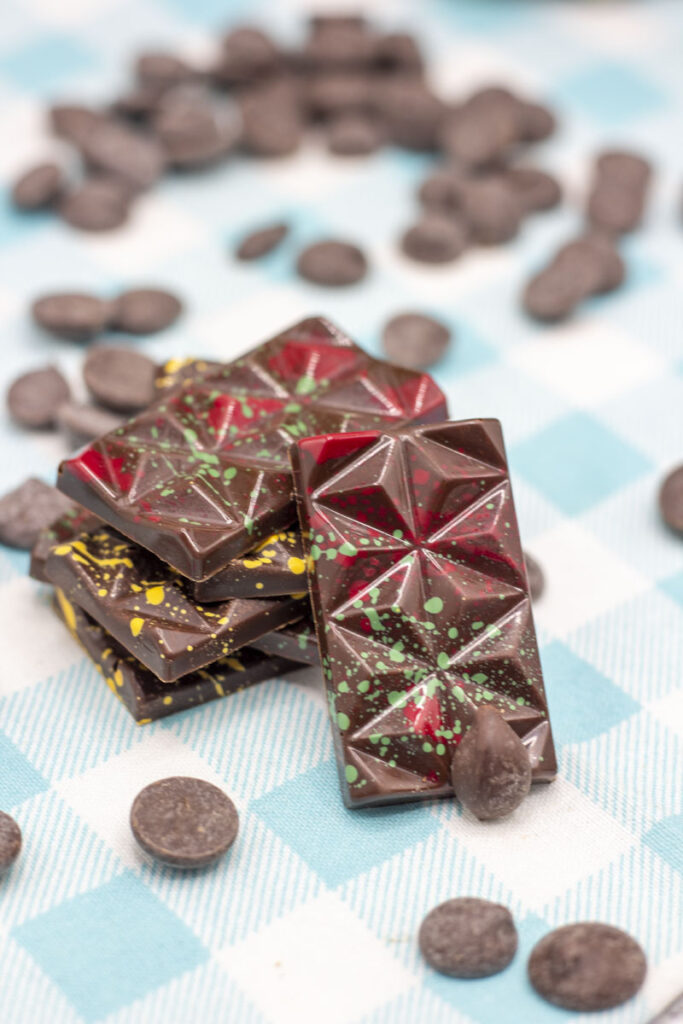
- Polycarbonate molds (optional, recommended) – If you’ve found this page and researching tempering chocolate, than I’m guessing you’re aiming for classy, high-quality products. Molds really help in achieving the clean, polished look (no shade to the free form truffles that I make all the time). Silicone molds are an alternative option, but I’ve found that they’re less reliable, and I have trouble cleaning them after multiple uses. However, they are more affordable, so if you’re just starting out they’re definitely an option and plenty of people have plenty of success with silicone molds. That said, again, if you’re here to invest, then polycarbonate molds are the way to go.
- Bench scraper and/or palette knife (required for polycarbonate molds) – You’ll want something with a clean, hard edge to scrape excess chocolate off your polycarbonate molds.
(list continued below)
- Scale (optional, strongly recommended) – chocolate is a finicky ingredient so a scale comes in handy. Technically this is optional, but for making consistent products and setting yourself up for success, it’s strongly recommended. The instructions I’m sharing will use weight measurements for exactness.
- Silicone mats or working surface (optional) – Obviously a working surface itself is required—if you know how to levitate your baking items, I’d love to see it! But I find large silpats are great options to keep your workspace clean and tidy up when you’re done. I’ve also used parchment paper as a temporary option, but I feel like I can reduce my paper waste by using reusable mats, while still being able to easily clean up after myself.
- Heat gun (optional) – to melt those last pesky lumps and have fine control over temperate, heat guns are very handy. I have yet to invest in one, but probably will soon enough.
Got your equipment? Continue reading for a more detailed and thorough explanation of tempering chocolate. Or jump straight to the recipe for the abbreviated how-to!
Jump to Recipesetup;
Setup of your workspace is key. I like to lay out my utensils and line my workspace with parchment paper or a silicone mat. Chocolate is messy, or so I’ve found, so make sure you’re set up and ready to go before starting!
process;
The method I’m outlining here for tempering chocolate is known as the “seeding” method. There are other methods out there, and different options work for different people and different situations. If you’re looking to make small batches at home, then seeding is great option for you!
Also, the temperatures listed here are for dark chocolate only. If you’re interested in tempering white chocolate or milk chocolate, the steps will be the same but the temperatures will be lower. Melt the chocolate to 45°C / 115°F, but when seeding, bring the chocolate down to 29°C / 84°F.
1. melt the base chocolate
You start by heating the chocolate in the microwave to a liquid consistency to give yourself a clean base to work with. Then you add pre-tempered chocolate slowly while keeping the chocolate moving which will bring down the temperature and encourage the right kind of crystals to form to create tempered chocolate. The short form equation for tempering chocolate is: Time + Temperature + Movement.
Basically you’re heating the chocolate to melt out any crystals (the thing that gives it structure). This way you start with a clean base. Melting the chocolate to 45°C / 115°F is the target. If you go over a few degrees, it’s fine. 45°C / 115°F is the minimum. That said, more is overkill and you definitely don’t want to heat your chocolate until it burns. I think I’ve accidentally zapped mine to 50+°C or so and still had successful results, but in general I try to stay as close to 45°C as I can.
Melting your chocolate in the microwave needs to be done in short bursts—never more than 45 seconds at a time. I usually do increments of 30 seconds, if only because my microwave has a “30 second” button. You will need to stir between each stint in the microwave to evenly distribute the heat each time. Of course, the first one or two times you zap your chocolate in the microwave you may not really be able to “stir” if it’s still solid. But as soon as any chocolate liquifies, give it a stir. The goal of stirring is to distribute the heat as a evenly as possible at all times. Temperature is key for tempering chocolate!
2. seed your chocolate with tempered chocolate
Once your chocolate has melted to 45°C / 115°F, you can move to the next step of tempering chocolate. It usually takes about 4-6 zaps in my microwave, but I would say my microwave is on the strong side. This is where your thermometer comes in. Once the majority of chocolate is melted, even when there are still lumps, start checking your temps. Make sure to test a couple of spots throughout the chocolate because it will never be completely uniform. If you see more than a few degrees discrepancy, stir more and then retest. You don’t have to go crazy, I’ll usually test 2-3 places to get a reading.
Once your melted chocolate is ready, we’ll start seeding. We’ll add in tempered chocolate to slowly cool the chocolate while encouraging the correct crystallization to occur. If you’re following along with the process I use, then you’ll use the same Callebaut callets you used for melting your base chocolate.
If you’re using another brand or item, make sure at this stage that you’re adding tempered chocolate. It can be in any form, but ensure it’s pure chocolate (no fillings or additives like nuts, fruits, fillings, etc.) and is tempered. Once you’ve had some success tempering chocolate, you can also use your own tempered chocolate in the future. I actually prefer my own where possible because I can make bigger bars and chunks that are easier to fish out when I’m done.
3. stir stir stir
I’ll usually start by adding half of whatever seeding chocolate I’ve set aside. You’ll stir gently, moving the chocolate around as the drops or chunks of tempered chocolate move around. Stir gently but you’re looking for the movement part of the equation (Time + Temperature + Movement), so don’t be timid. I try not to incorporate too much air into the chocolate, but I do swirl around the mixture and scrape down the sides. Again, think even heat distribution. That’s what we’re going for.
Once the added chocolate is melted, test the temperature. You’re looking to bring the temperature down to 31°C / 88°F. Taking that temperature will give you a rough idea how much additional seeding chocolate to add. If it’s your first time, just go slow and add a Tablespoon or two at a time. Keep stirring. Repeat the process as needed until you get the chocolate to the desired temperature. Reminder to probe a few places in your chocolate to ensure there’s no pockets or hotspots. When I’m “done” some of those pockets will be 31°C or 32°C degrees, but I aim for primarily 31°C / 88°F in the majority of the mixture.
It’s also important to note that when your chocolate reaches the desired temperature, there may be small lumps of tempered chocolate still floating about. Meaning they may not have melted fully. This is where you use a heat gun if you have one. Fish any lumps out on your spatula and melt them with the gun, making sure to stir between each melting and keep the heat distributed evenly.
If you don’t have a heat gun, another option is to fish out the lumps or chunks. Just set them on your silpat or parchment paper and allow to solidify. You can reuse that chocolate when you melt your base chocolate for your next batch. In theory they won’t harm your chocolate if you leave them in. But practically, it makes the mixture uneven for pouring and spreading, and there’s a higher potential for irregularities in setting. So I recommend to get rid of them, whether by heat gun or setting aside.
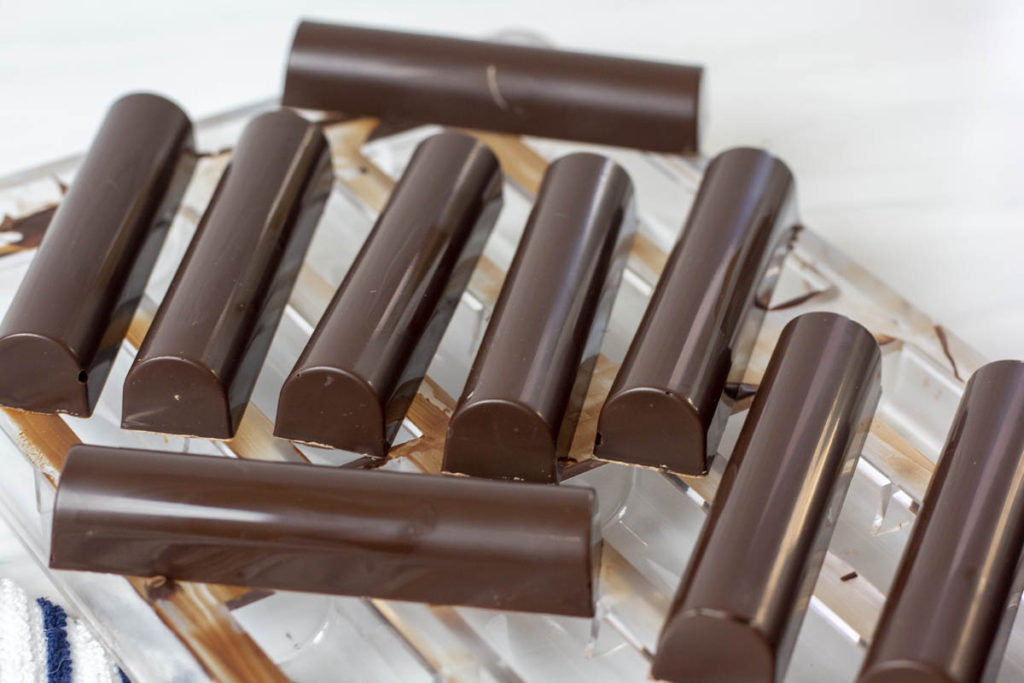
4. fill your molds
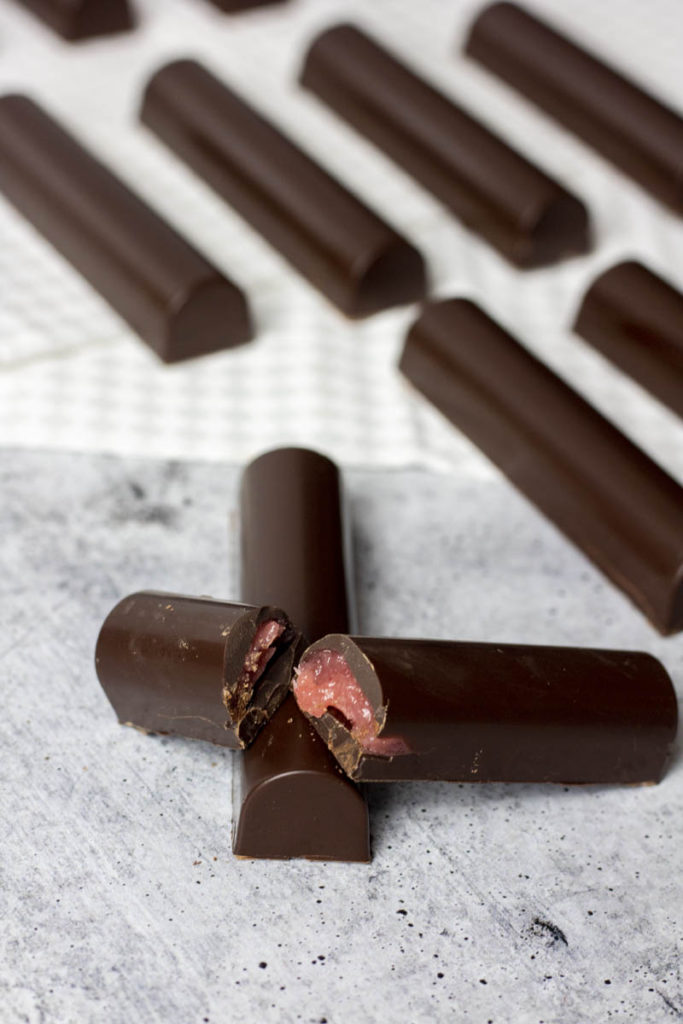
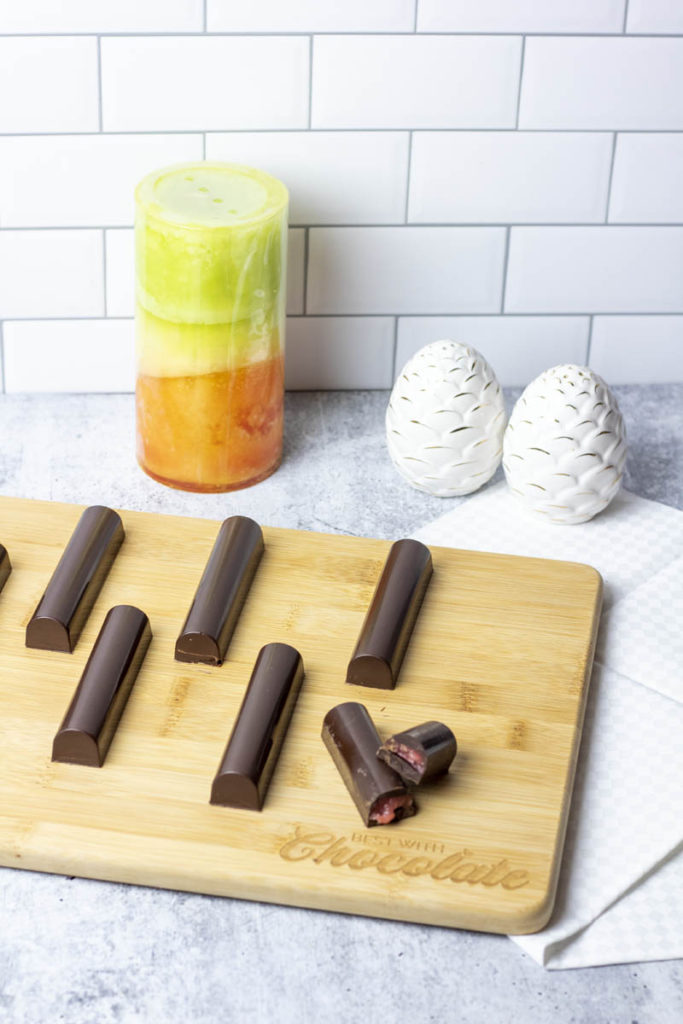
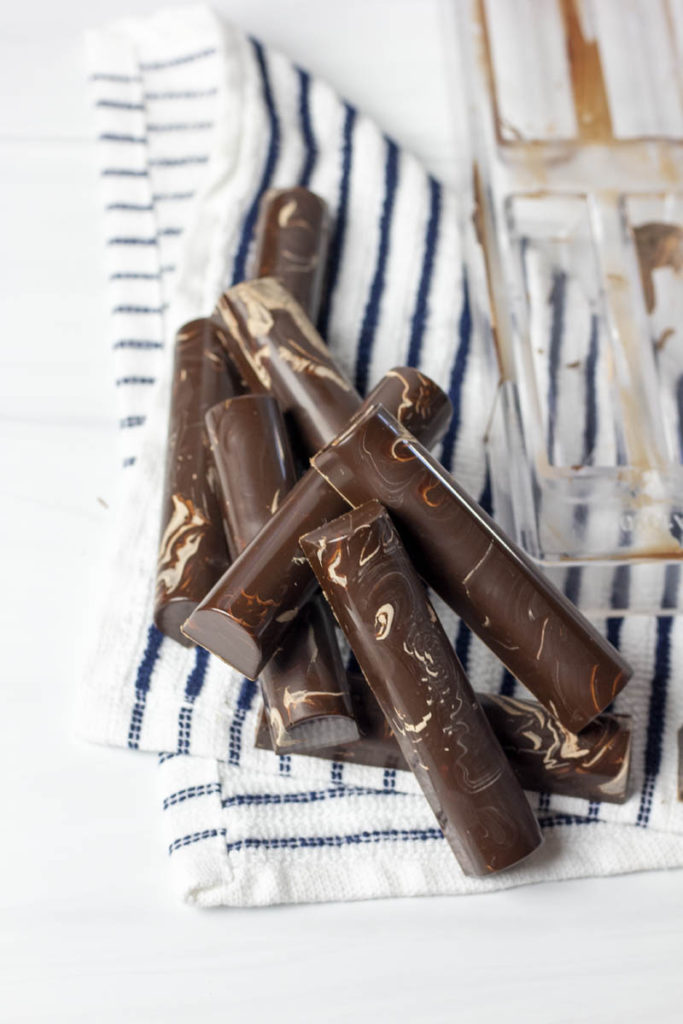
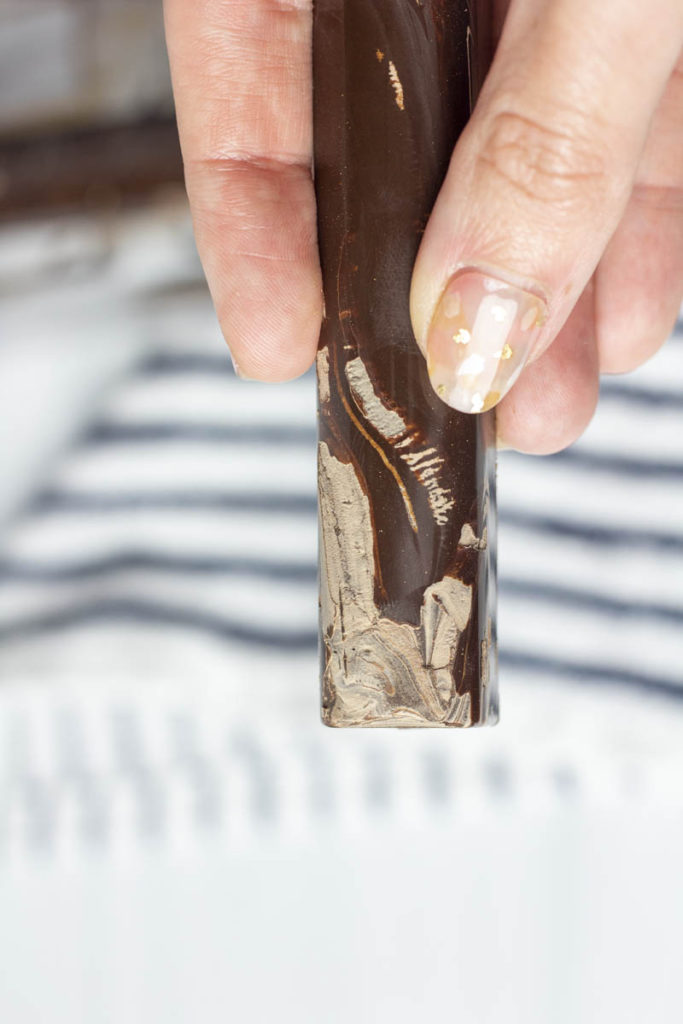
Once your chocolate has reached the desired consistency and temperature, it’s time to use it. If using polycarbonate molds, then pour the chocolate in. If making solid chocolate shapes, just scrape down the mold with the flat blade of your scraping tool (bench scrape, palette knife, etc.). Make sure to tap or shake the molds to remove air bubbles. If you’re looking to fill the molds in the future, then you’ll fill the cavities and then overturn the mold and let the chocolate drip out. Keep in mind all of this is a messy process.
If you want to fill multiple molds, you can try to get the chocolate back in the bowl, and then repeat with the next mold. I will say, I’ve never done this without making a huge mess but I also tend to do small batches and therefore don’t use big bowls. If you have a big bowl it might help you catch the drops and drips. I’ll still follow up with a swipe across the mold with my bench scraper once I’ve let the excess run out.
If you’re using silicone molds, it’s the same general process. It might be harder to scrape off excess given the bendable nature of silicone, so you may want to be more accurate with filling cavities. For example you might want to use a spoon to drop the correct amount into each cavity. Just keep in mind that time is of the essence, as the tempered chocolate will be beginning to set.
If you’re dipping items directly in your chocolate, I recommend a heat gun. Like I said, time—and really temperature—is of the essence. By dipping things into your chocolate you’re likely affecting the temperature of the overall chocolate (which is fine) but you just want to keep it workable. This is where a heat gun can come in handy. In between every couple of dips you can double check the temperature and apply a little heat as needed to keep the mixture around 31°C / 88°F without resorting to the microwave.
5. now cross your fingers…and wait
It’s been a journey, tempering chocolate. Now you wait. If making molded chocolates, either shells to be filled later or solids, then tuck your mold away in a cool, dry place. By cool, I mean you don’t want to keep it in a refrigerator. Some people use wine coolers, but I find that in a cooler part of the house without direct sunlight is fine enough for me in most cases. But depending on where you live and what temperatures you come in contact with, you may need to adjust your environment.
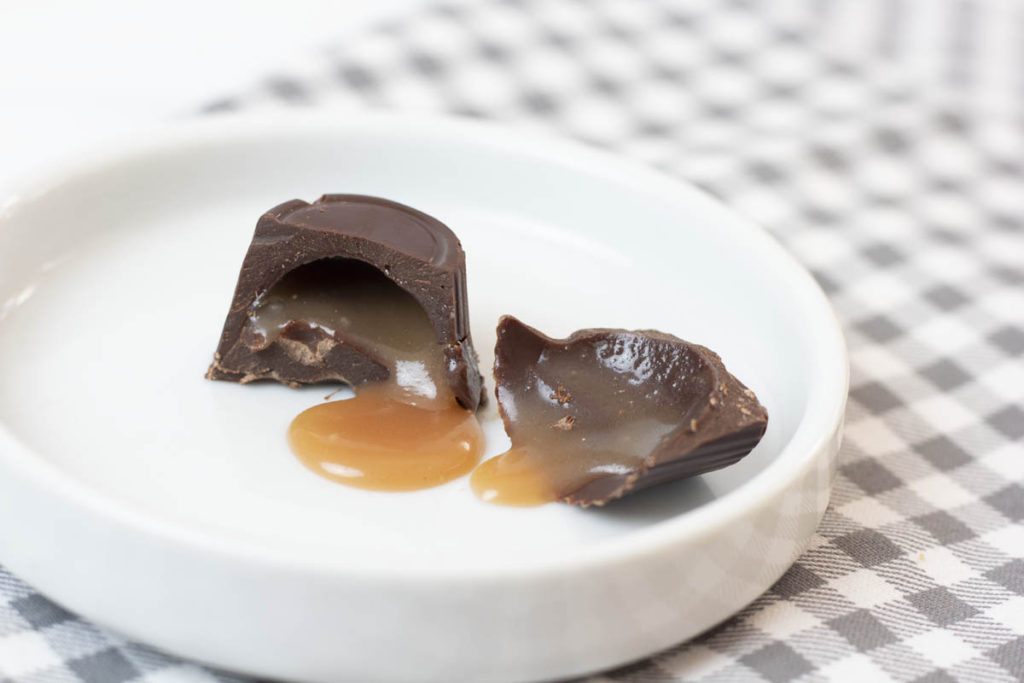
Leave it overnight. It really takes over 24 hours to fully set and the crystalline structure to fully set. But I am generally impatient and think overnight is a reasonable start. If filling your chocolates, add your cooled filling at this point. I’ll usually wait another few hours before capping (filling the top with chocolate). Typically I’ll then repeat this tempering process and fill the remaining cavity and scrape and then allow to set again for filled chocolates.
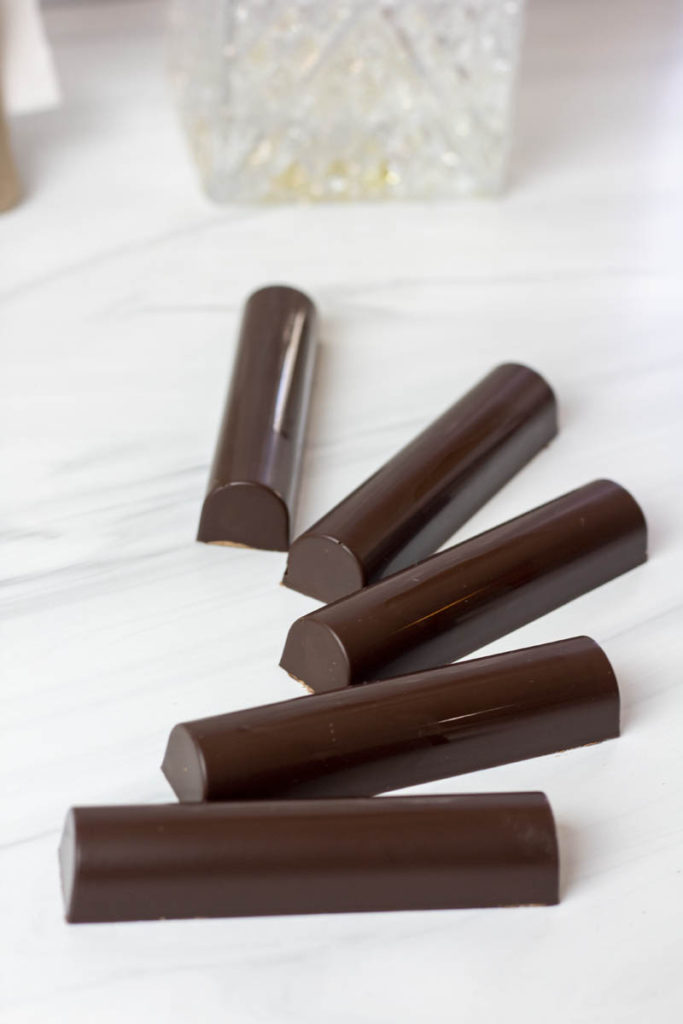
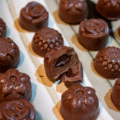
To turn out your chocolates, if you’re using polycarbonate molds and have tempered correctly, they should pretty much fall out when you overturn the molds. I’ll usually upturn it pretty forcefully on a counter or flat surface to get them out. Sometimes some extra tapping is required to get those that resist. The chocolate contracts as it rests and should pull away from the mold just a touch. For silicone molds, it’ll depend on the shape of the mold, but you’ll unmold them by pushing them out (or they may also fall out, though less likely and consistently than the polycarbonate molds.)
And voila! You’ve succeeded in tempering chocolate! Or…maybe you still have questions. Maybe it didn’t work perfectly. You’re not alone! Keep reading for some help with troubleshooting.
Ready to get started?
Jump to Recipetroubleshooting;
Let’s start by acknowledging–tempering chocolate is hard! Chocolate is very tempermental. See what I did there? It takes time and practice and skill to master. Sometimes you’ll want to pull your hair out. I mean, just look at all the trouble Claire Saffitz had over on Gourmet Makes when trying to temper chocolate! And she’s a professional pastry chef. So if you’re new to this, be patient with yourself and your chocolate.
If you’re looking for an easy, consistent solution to truffles and chocolate making, then maybe compound chocolate is a better option. This is chocolate that usually has one or two additives that help it achieve a glossy, shiny finish but doesn’t require tempering. Usually it’s just melt and go. Check out this post where I go into more detail on compound chocolates and recommended products.
However, if you’re here to stay, then this section might help. Keep in mind that I’m learning too. As of writing this post I’ve only started to try my hand at tempering chocolate, and I’m not about to stop anytime soon. So I’ll keep updating this post as I learn more!
Help! My chocolate looks chalky, gray, swirly, or not like what it’s supposed to! It’s most likely bloom, and incorrectly tempered chocolate. The good news? Unless moisture gets in and seizes the chocolate, you can just reheat it and attempt tempering again. You can recycle chocolate as long as it is pure chocolate (no extra goodies or fillings), just ensure it gets melted down to 45°C / 115°F to ensure a clean base for tempering.
Oh no, my chocolate is cracking. Cracking can be caused by imperfections in the mold. I mention this first, because it’s easy and simple to check–just inspect your molds. A second possibility is issues with cooling temperatures. If you choose to put it in a fridge or in very cool places or take it back and forth between cool temperatures and warm temperatures while it’s setting, you may get cracks.
Ugh, some pesky chocolates are stuck in their molds – For polycarbonate molds, try popping the molds in the freezer for a few minutes and then tapping them out. You should have fewer issues with silicone molds since you should be able to push them out more easily with a flexible silicone.
Touching the chocolate leaves fingerprints. How do I prevent that? – Cotton gloves. I’ve heard some people use cotton gloves and then latex on top. Cotton stops the heat from your hand, and the latex will prevent fingerprints.
My filling is pushing out or cracking chocolate…help! – There’s two options here. Make sure everything is room temperature. For example if you chill your filling, and encase it in chocolate, when it expands at room temperature, it will force cracks in your shell. So if you allow everything to come to resting temperature you should have fewer problems. A second option is simply to use a thicker layer of chocolate. Or double dipping/coating if that’s an option.
How do I make my seams seamless on my chocolates? – The answer depends on what seams you’re trying to create. A heat gun can help for molded truffles. Reheat the edges so when you cap them, they’ll adhere more seamlessly together. If you’re doing molded chocolates that need to be assembled together after the fact (like putting together two halves of an easter bunny), then here’s what I suggest. Gently warm a pan or metal object with a flat surface. Place each half on the flat surface to barely melt the edge and then hold the two pieces together and reinforce with additional chocolate as necessary.
These tiny air bubbles are so annoying. How do I get rid of them? You’ll need to tap your chocolate molds to release air bubbles. When you pour chocolate into cavities it’s easy for air to get trapped. I find for polycarbonate molds that shaking the molds rapidly back and forth can be the best way to make trapped air bubbles rise up. Silicone molds are slightly harder to get all the bubbles out of, so I will generally tap them firmly on the counter multiple times.
More questions? Leave a comment below!
cleaning;
Tip 1: No water! Water is the bane of chocolates existence. So when you’re cleaning up or preparing to make your next batch of chocolate—you want to ensure your tools, molds, and chocolate is moisture free.
Tip 2: No dish soap! Don’t use dish soap. It can leave residues that don’t keep your tools in proper form. This primarily applies to the molds, but I also apply it to my designated plastic bowls for chocolate making. Other tools—metal tools, spatulas, I wash like normal.
Tip 3: Treat your molds with care! Polycarbonate molds in particular are prone to scratches so you want to be delicate. I usually turn the oven down to the lowest setting (170F on my particular oven) and let the molds sit for 5 minutes. One the chocolate is melted, wipe off with a paper towel or microfiber cloth. Then use a cotton round to polish each cavity.

tempered chocolate;
Equipment
- Instant read thermometer
- Plastic, microwave safe bowl
- Spatula
- Bench scrape or palatte knife with a straight edge
- polycarbonate molds (silicone can also be used, but see post for why polycarbonate are recommended)
Ingredients
- 400 g couverture chocolate, for melting (I use Callebaut callets for both)
- 150 g tempered couverture dark chocolate, for seeding (I use Callebaut callets for both)
Instructions
- In a microwave-safe plastic bowl, add 400g of couverture chocolate.
- Melt the chocolate. Microwave in 30-45 second increments, making sure to stir thoroughly with your spatula between each stint in the microwave, as soon as any starts melting. The goal is to evenly distribute heat and melt all crystals in the chocolate to form a uniform base.
- Bring the chocolate to 45°C / 115°F. Periodically check your chocolate with the thermometer. I suggest checking 2-3 places in your bowl since heat does not always distribute evenly. Once your chocolate reaches 45°C / 115°F you're ready for the next step. It's ok to go over by a few degrees, but try to keep it as close as possible. Heating it significantly more runs the risk of burning your chocolate at worst, and at best, will require extra chocolate for seeding (the next step).
- Seed the chocolate. At your workstation, begin by adding half of the seeding chocolate, roughly 75g, and stir stir stir. Try not to incorporate too much air, but you want a lot of movement in the chocolate. You're looking to take the overall temperature down to 31°C / 88°F for dark chocolate, and 29°C / 84°F for milk and white chocolate. It's expected that all of this chocolate should melt before reaching the desired temperature, but results may vary, so go by your thermometer readings.
- Continue seeding the chocolate to 31°C / 88°F (dark) or 29°C / 84°F (milk/white). Once the first half of the seed chocolate has melted, you should see a drop in temperature, but it likely hasn't reached the desired temperature. Continue adding the remaining seeding chocolate approximately 1-2 Tbsp at a time and repeating until the chocolate reaches a uniform temperature of 31°C / 88°F (dark) or 29°C / 84°F (milk/white). Note you may not use all the chocolate, or you may require extra depending on your environment.
- Remove any remaining lumps. When your chocolate reaches the correct temperature, there may still be lumps of seed chocolate visible. Option 1: You can fish out the unmelted lumps and smear them on parchment paper or a surface to set up and reuse in future chocolate making.Option 2: Fish out the unmelted lumps on your spatula and use a heat gun to melt them. Make sure to stir everything back in and ensure the heat is redistributed evenly before proceeding.
- (Optional) Test your temper. Smear the back of a piece of parchment paper or palatte knife with the chocolate. If properly tempered, the chocolate should begin to firm up within 1-2 minutes and be glossy and smooth.
- Fill molds. Fill your molds as desired and shake to remove any air bubbles. If molding solid forms, fill the mold with chocolate and use a bench scraper or flat surface to scrape off excess. If doing filled forms, add the chocolate to the molds, and overturn them to allow excess to drip off. Follow up by using a bench scraper or flat surface to scrape off excess.
- Allow to set overnight or 24+ hours.
- (For filled chocolates) Add filling and cap. Allow filling to come to room temperature, then pipe into the molds where you created the chocolate shells. Recommend allowing the piped filling to sit 1-8 hours before filling. To cap, repeat the process to temper chocolate. For a seamless seal, use a heat gun to gently rewarm the edges of the chocolate shells prior to capping. To cap, pour the new batch of tempered chocolate over the filling and scrape off excess by using a flat surface. Allow to set overnight or 24+ hours.
- Remove from molds. If chocolate is tempered correctly, they should release from polycarbonate molds fairly easily. Overturn, firmly slapping against a hard and flat surface (like a counter). Most, if not all of the chocolates should release, but sometimes there are a pesky few. Repeat the slapping process a few times, but for very stubborn truffles, pop the mold into the freezer for 30 seconds to 1 minute and repeat the process.
8 Comments
peanut butter and jelly truffles; | Best With Chocolate
August 4, 2023 at 12:45 pm
[…] you want to tackle chocolate tempering, you may want to start with my guide to tempering chocolate: the seeding method; In it, I’ll go over the process of tempering chocolate as well as alternatives and the best […]
the ultimate holiday truffle guide; | Best With Chocolate
August 4, 2023 at 1:10 pm
[…] tempering chocolate: the seeding method; […]
pumpkin spice chocolate patties; | Best With Chocolate
September 1, 2023 at 9:15 am
[…] To keep this recipe simple and easy, go for a chocolate coating compound. If you’re interested in tempering your own chocolate, then check out my guide to tempering. […]
buckeye pretzel bites; | Best With Chocolate
September 24, 2023 at 10:59 am
[…] is made for melting. If you’re feeling adventurous, you could even skip these options and temper your own chocolate. Tempered chocolate will come out snappy and shiny and is perfect for […]
jellied chocolate frogs; | Best With Chocolate
March 8, 2024 at 7:22 pm
[…] than when tempering chocolate from scratch. If you’re interested in tempering chocolate, check out my guide to the seeding method. But we’ll leave that for another post because it takes quite a bit of time and technique. […]
homemade marshmallow s'mores; | Best With Chocolate
July 8, 2024 at 12:42 pm
[…] extra work. I used a squeeze bottle for better control around the edges. Of course you can always temper chocolate if you like the extra challenge. Coverture chocolate would elevate these delicious treats even […]
hokey pokey honeycomb candy; | Best With Chocolate
September 8, 2024 at 5:08 pm
[…] a regionalized name for honeycomb candy. To be fair, I hadn’t heard of that until my foray into couverture chocolate relatively recently. I’ve found some sources that say hokey pokey is the Cornish term for […]
昔話おじいさん
September 12, 2024 at 8:48 am
I am extremely impressed with your writing skills and also with the
layout on your blog. Is this a paid theme or did you customize it yourself?
Either way keep up the excellent quality writing, it’s rare
to see a great blog like this one today.
Comments are closed.