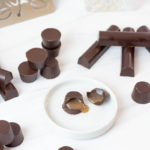
tempered chocolate;
Gourmet, tempered chocolate--shiny and smooth, with a snap! Perfect for truffles, bars, molded chocolate, and more! The sky's the limit.
Print Recipe
Pin Recipe
Equipment
- Instant read thermometer
- Plastic, microwave safe bowl
- Spatula
- Bench scrape or palatte knife with a straight edge
- polycarbonate molds (silicone can also be used, but see post for why polycarbonate are recommended)
Ingredients
- 400 g couverture chocolate, for melting (I use Callebaut callets for both)
- 150 g tempered couverture dark chocolate, for seeding (I use Callebaut callets for both)
Instructions
- In a microwave-safe plastic bowl, add 400g of couverture chocolate.
- Melt the chocolate. Microwave in 30-45 second increments, making sure to stir thoroughly with your spatula between each stint in the microwave, as soon as any starts melting. The goal is to evenly distribute heat and melt all crystals in the chocolate to form a uniform base.
- Bring the chocolate to 45°C / 115°F. Periodically check your chocolate with the thermometer. I suggest checking 2-3 places in your bowl since heat does not always distribute evenly. Once your chocolate reaches 45°C / 115°F you're ready for the next step. It's ok to go over by a few degrees, but try to keep it as close as possible. Heating it significantly more runs the risk of burning your chocolate at worst, and at best, will require extra chocolate for seeding (the next step).
- Seed the chocolate. At your workstation, begin by adding half of the seeding chocolate, roughly 75g, and stir stir stir. Try not to incorporate too much air, but you want a lot of movement in the chocolate. You're looking to take the overall temperature down to 31°C / 88°F for dark chocolate, and 29°C / 84°F for milk and white chocolate. It's expected that all of this chocolate should melt before reaching the desired temperature, but results may vary, so go by your thermometer readings.
- Continue seeding the chocolate to 31°C / 88°F (dark) or 29°C / 84°F (milk/white). Once the first half of the seed chocolate has melted, you should see a drop in temperature, but it likely hasn't reached the desired temperature. Continue adding the remaining seeding chocolate approximately 1-2 Tbsp at a time and repeating until the chocolate reaches a uniform temperature of 31°C / 88°F (dark) or 29°C / 84°F (milk/white). Note you may not use all the chocolate, or you may require extra depending on your environment.
- Remove any remaining lumps. When your chocolate reaches the correct temperature, there may still be lumps of seed chocolate visible. Option 1: You can fish out the unmelted lumps and smear them on parchment paper or a surface to set up and reuse in future chocolate making.Option 2: Fish out the unmelted lumps on your spatula and use a heat gun to melt them. Make sure to stir everything back in and ensure the heat is redistributed evenly before proceeding.
- (Optional) Test your temper. Smear the back of a piece of parchment paper or palatte knife with the chocolate. If properly tempered, the chocolate should begin to firm up within 1-2 minutes and be glossy and smooth.
- Fill molds. Fill your molds as desired and shake to remove any air bubbles. If molding solid forms, fill the mold with chocolate and use a bench scraper or flat surface to scrape off excess. If doing filled forms, add the chocolate to the molds, and overturn them to allow excess to drip off. Follow up by using a bench scraper or flat surface to scrape off excess.
- Allow to set overnight or 24+ hours.
- (For filled chocolates) Add filling and cap. Allow filling to come to room temperature, then pipe into the molds where you created the chocolate shells. Recommend allowing the piped filling to sit 1-8 hours before filling. To cap, repeat the process to temper chocolate. For a seamless seal, use a heat gun to gently rewarm the edges of the chocolate shells prior to capping. To cap, pour the new batch of tempered chocolate over the filling and scrape off excess by using a flat surface. Allow to set overnight or 24+ hours.
- Remove from molds. If chocolate is tempered correctly, they should release from polycarbonate molds fairly easily. Overturn, firmly slapping against a hard and flat surface (like a counter). Most, if not all of the chocolates should release, but sometimes there are a pesky few. Repeat the slapping process a few times, but for very stubborn truffles, pop the mold into the freezer for 30 seconds to 1 minute and repeat the process.
Did you make this recipe?Mention @bestwithchocolate or tag #bestwithchocolate!