no sugar watermelon cake;
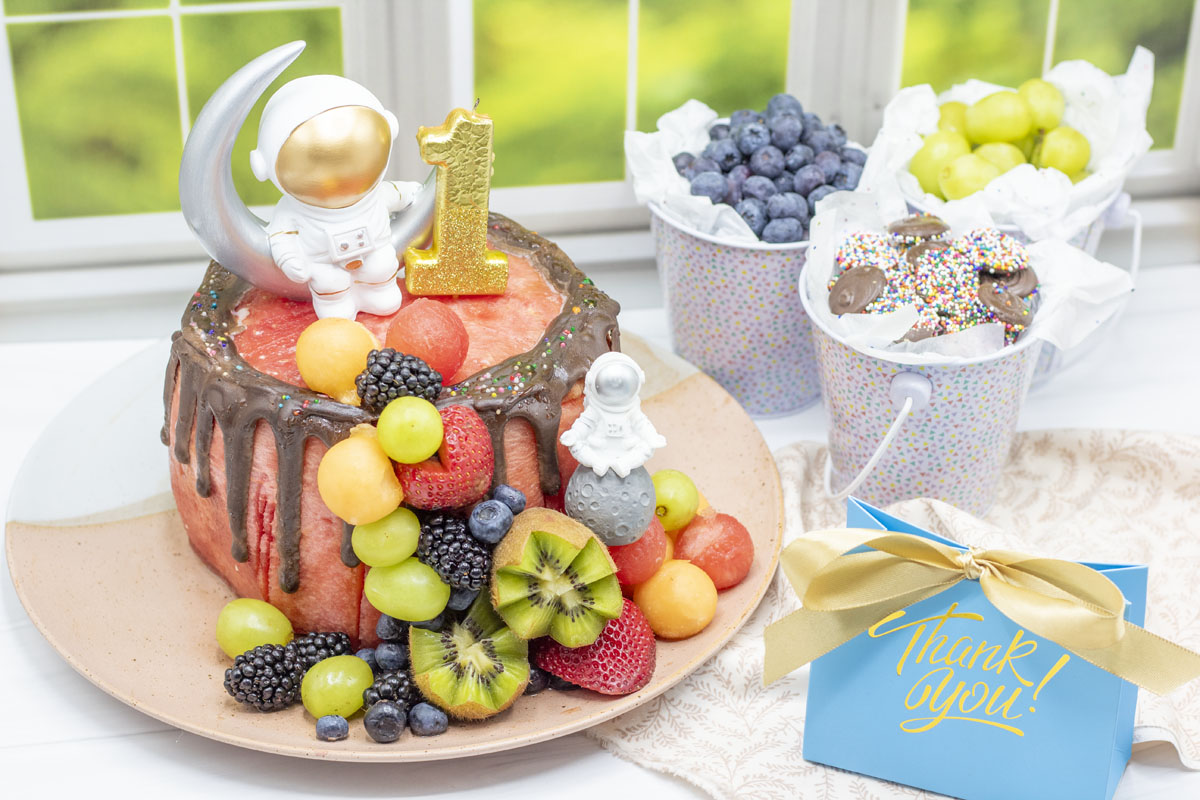

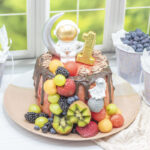
This no sugar watermelon cake is so bright, healthy, flavorful, and perfect for summer. I used this as my son’s first birthday party cake! I wanted something with less sugar but that was still festive. And at a birthday party, it needs to look like cake, so I settled on this watermelon cake. And don’t worry he still had a bite of traditional cake on his birthday!
No sugar watermelon cake is so easy when it comes to ingredients, it’s surprisingly simple. But that means the devil’s in the details. Trimming the watermelon rounds to make appropriate tiers, and arranging the fruit to cascade down the side of the cake takes a little bit of artistry.
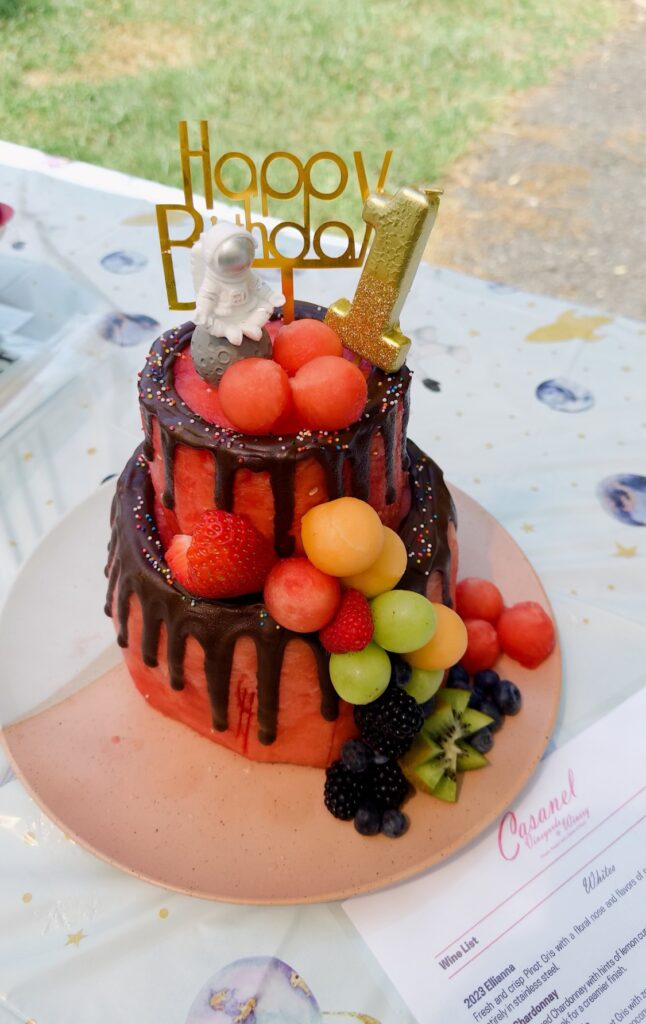
I made a two-tier cake for the party, but my no sugar watermelon cake would work just as well for one tier or three. I only have a couple of photos of the actual party-day two-tiered cake (thanks Steph!) as you can see below, but I have more photos of my practice one-tier cake so you’ll see both in this post.
Let’s start with the watermelon rounds. You’ll want a large watermelon to handle two “cake” rounds. If you want or need to go for 3, you can, but I wouldn’t go much higher than that. It’s a heavy cake, even if a lot of it is water, but you want it to be stable. If you do attempt three layers you’ll likely need a second watermelon unless you make the rounds much shorter than here.
Assuming you’re making a two layered cake, you’ll need to cut the watermelon in “half”. Half is in quotes deliberately.
Secret to success
Assuming you’re making a two-layer no sugar watermelon cake, you’ll need to cut the watermelon in “half”. Half is in quotes deliberately. You’ll want to offset your half on one side by a few inches. That way the big bottom round includes the widest part of your watermelon. My watermelon was probably 20” and I think I had two “halves” that were roughly ⅔ and ⅓ of the total watermelon. Also, when cutting the ends to make a flat surface, be generous with at least one side. You’ll want to use that for decorative melon balls later.
When cutting the ends to make a flat surface, be generous with at least one side. You’ll want to use that for decorative melon balls later.
secret to success
The good news is, you don’t need perfect precision in your first cuts with the watermelon. You’ll be trimming the watermelon a bunch anyway to make your no sugar watermelon cake pretty. It’s easy to stack the rounds next to each other once they’re cut and trim some off the top if you’ve got one tall friend of the two. Honestly, I didn’t even really check they were exactly the same height—as long as it looked pretty and was stable I was happy.
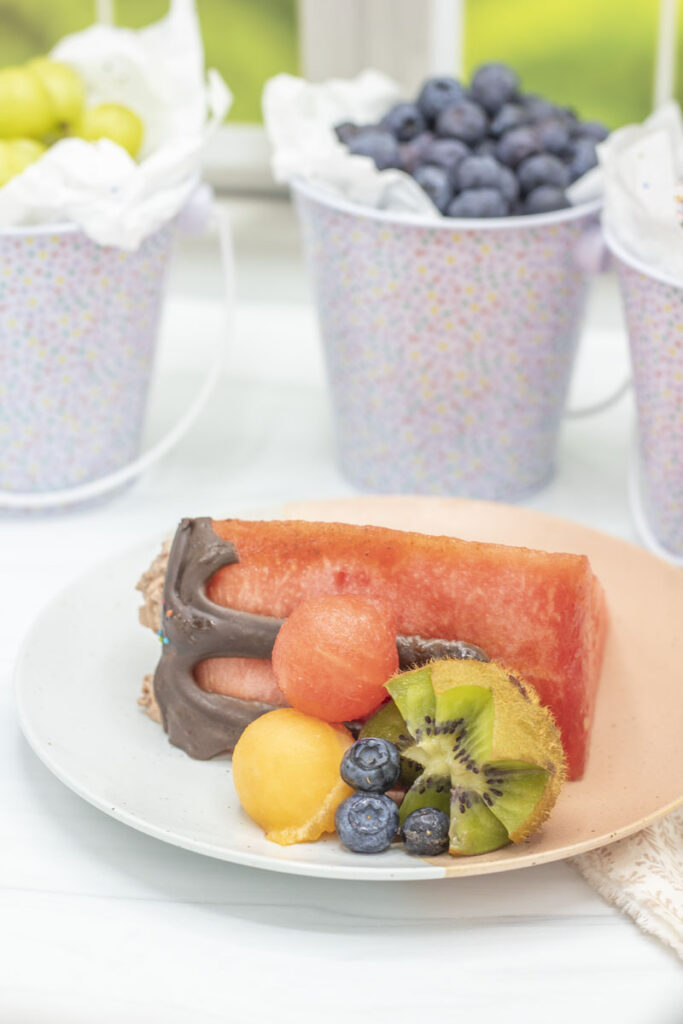
I start trimming by crudely cutting away the rind, in strong, pretty blocky cuts. I’m even happy to see some of the white pith still there because I know I’ll be trimming lots more as I go. So round and round I go gently shaving off more and more, rounding as I go.
Trim your no sugar watermelon cake to your heart’s content. I didn’t mind a few loose cuts. It just needed to bear enough resemblance to a cake that it was identifiable. It’s pretty tough to hand-trim a watermelon round to the same standard as a cake baked in a tin. So aim for just enough but not too much. Know when to quit trimming otherwise, you’ll whittle away your watermelon and then end up with a much smaller cake.
Know when to quit trimming otherwise you’ll whittle away your watermelon and then end up with a much smaller cake.
Secret to success
Place the round on a cutting board with a lip or a sheet pan with sides to catch the juices. Freshly cut, there will be a lot of water so prepare something to help keep it contained. Do the same trimming for the second round (and the third if planning the third tier). Once you have your rounds, they’ll leak watermelon juice like crazy. If you assemble the full no sugar watermelon cake immediately, you’ll get a nice big puddle.
Use paper towels to blot off some of the excess moisture. If you’re comfortable with cloth touching your cake, you can use a clean dish towel as well. If you plan for the chocolate drizzle around the cake, then make sure you blot the edges really well before proceeding. Keep the rounds separated and on separate plates while you work on the chocolate “icing”. Since there’s no traditional frosting or anything, it makes it easy to assemble your tiers later. Take full advantage.
My no sugar watermelon cake will technically have a little bit of sugar in the chocolate and sprinkles, but it’s optional and besides, a few bites of chocolate never hurt anyone! For the chocolate, you can decide what quality you want to use. I used simple candy coating because I wanted it easy and resilient. which turned out a good thing because it was a nice day out for the party but pretty hot. The other benefit of candy coating is that it comes in many colors, so you can add a thematic color if you so desire, but I was happy with a classic dark chocolate look.
If you want to use sprinkles, make sure you have them handy before you’re ready to add the “icing” chocolate drizzle. The chocolate can set fast depending on the temperature of your watermelon.
Secret to success
It’s likely for the chocolate to harden pretty quickly depending on the temperature of your watermelon. So if you want to use sprinkles, make sure you have them handy before you’re ready to add the “icing” chocolate drizzle. The chocolate can set fast depending on the temperature of your watermelon.
Melt your candy coating according to package instructions, and then add it to a piping bag. You’ll want a piping bag with an appropriate tip (e.g. round tip somewhere in the 0.2″ range). Gently pipe the edges. I like to go around the edge at least one time through. Once there’s something to grip onto, I start periodically squirting some out at the edge and letting it run down the sides. Sprinkle some of the sprinkles on, if using.
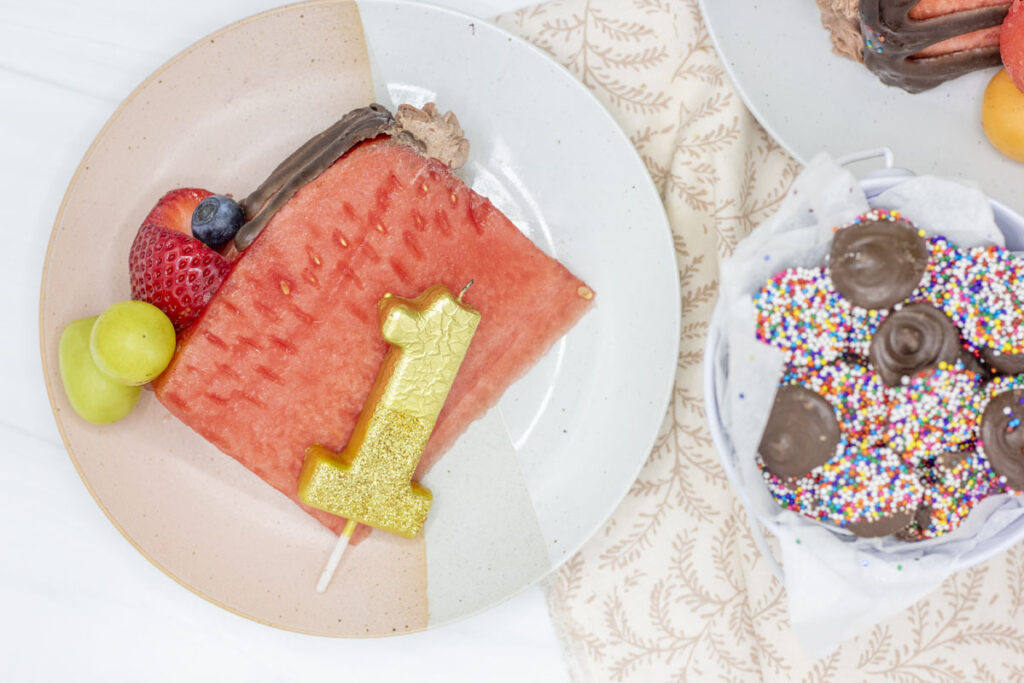
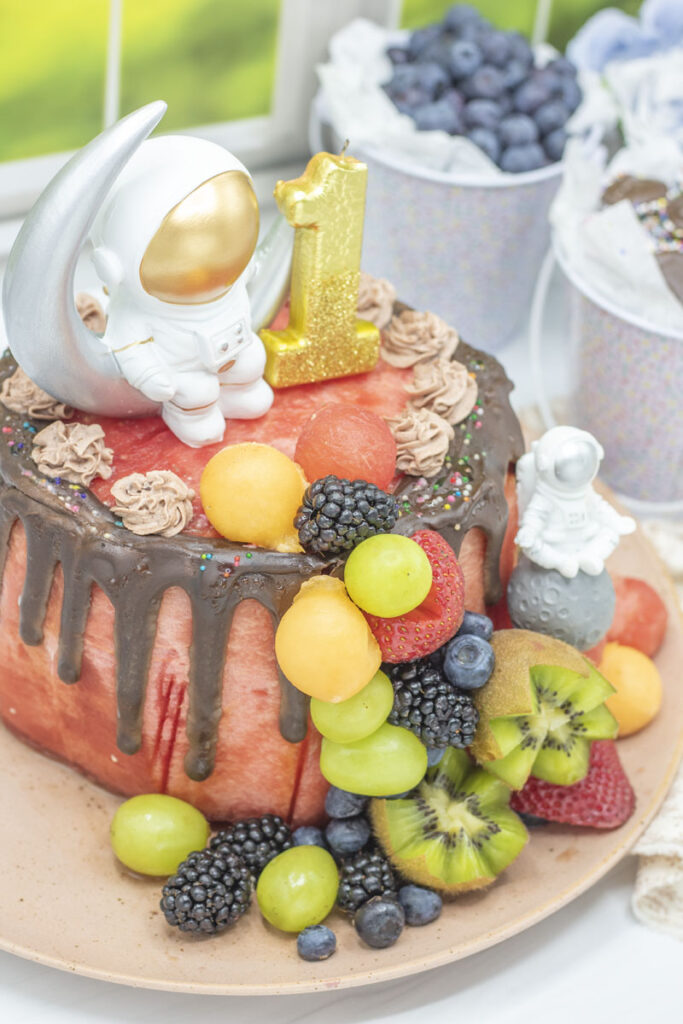
I think the chocolate really adds to the cake ambiance. The other part is the decorations. Of course, you can use any decorations you want. Since our theme was “first trip around the Sun” the little spacemen were an adorable and festive add. But this cake could look just as sweet with only fruit.
When you’re ready to assemble, I recommend putting a folded (and possibly trimmed to avoid unsightly corners poking out) paper towel on the plate before placing the first round. This helps twofold: (1) it absorbs some of the water, and (2) it helps keep the cake from slipping on the plate. I’ll do the same thing between tier 1 and tier 2 as well for a little extra added traction. Once assembled, it’s ready to start decorating!
For the fruit on the no sugar watermelon cake, I really tried to keep it simple with just a few fancy cuts and a melon baller. The kiwi was just a knife zigzagging up and down across the whole fruit. Make sure you cut deep enough to separate the halves.
For the strawberries, I cut a couple into makeshift hearts. It helps to have berries that are predisposed to a heart shape if you can pick them out of your pint. Simply cut out the white stem area with diagonal perpendicular cuts to make sweet little hearts. Grapes, blueberries, raspberries, and blackberries are all perfect in their natural states.
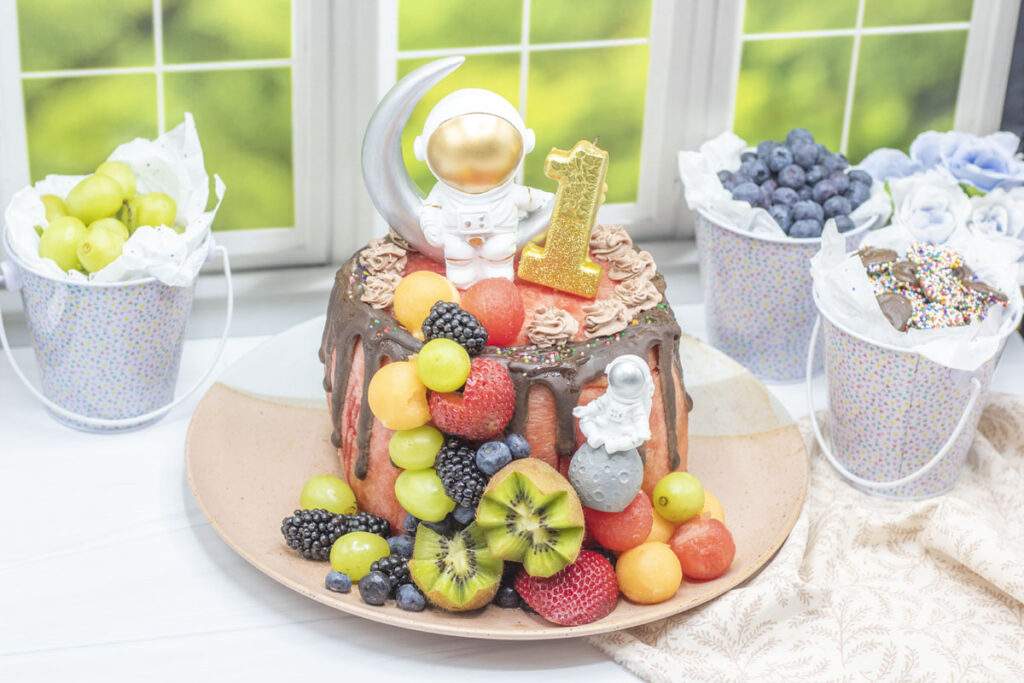
For some added color, take a melon baller to watermelon trimmings (I had the most luck with the top and bottom ends). And I also used the melon baller on cantaloupe as well for some added orange. I think this ended up working really well–they kinda looked a little like moon rocks in line with our space theme. You could also use a cookie cutter shape on some of the larger fruits like cantaloupe, kiwi, or watermelon to make stars or hearts, or I don’t know–cows! There are some crazy cookie cutters out there.
And don’t limit yourself to the fruits I have here, I’ve seen a couple of photos of dragonfruit additions that are really cute and the white makes a nice contrast to the pink no sugar watermelon cake. Use whatever fruits you want, your favorites will be the best!
Be deliberate with your arrangement because if you poke extra holes you’re going to have to live with them or cover them up with fruit.
secret to success
Once you’ve prepared some of your decorative fruit, grab your toothpicks and start poking. Be deliberate with your arrangement because if you poke extra holes, you’re going to have to live with them or cover them up with fruit. I used toothpicks on the largest fruit (melon balls, grapes, strawberries, blackberries) to sort of outline a plan on how I wanted them to cascade.
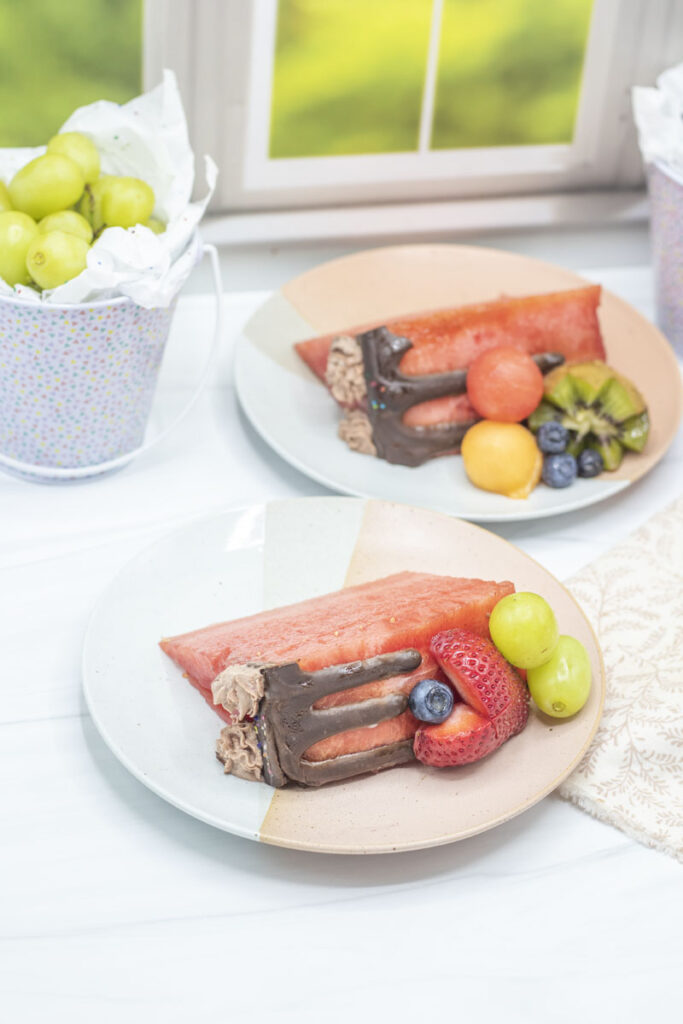
Then I went back and added toothpicks if necessary, but a lot of the smaller berries (blueberries especially, but blackberries and raspberries too) could just rest on the support of the other fruit. The kiwis are too large and slippery to bother supporting with toothpicks, so I had them rest on the plate itself.
I also had a rough rainbow pattern going on my no sugar watermelon cake for the actual party, but I changed it up for the one-tier one to show some variety. For the two-tier cake: I started with watermelon, raspberries, and strawberries, followed by the orange cantaloupe melon balls, then green grapes and kiwi on the plate, ending the trail with blackberries and blueberries. I think it looked pretty, but you don’t have to follow my pattern exactly. You may be more comfortable with perching just a couple of fruits on the top surface of the layers so they have more support.
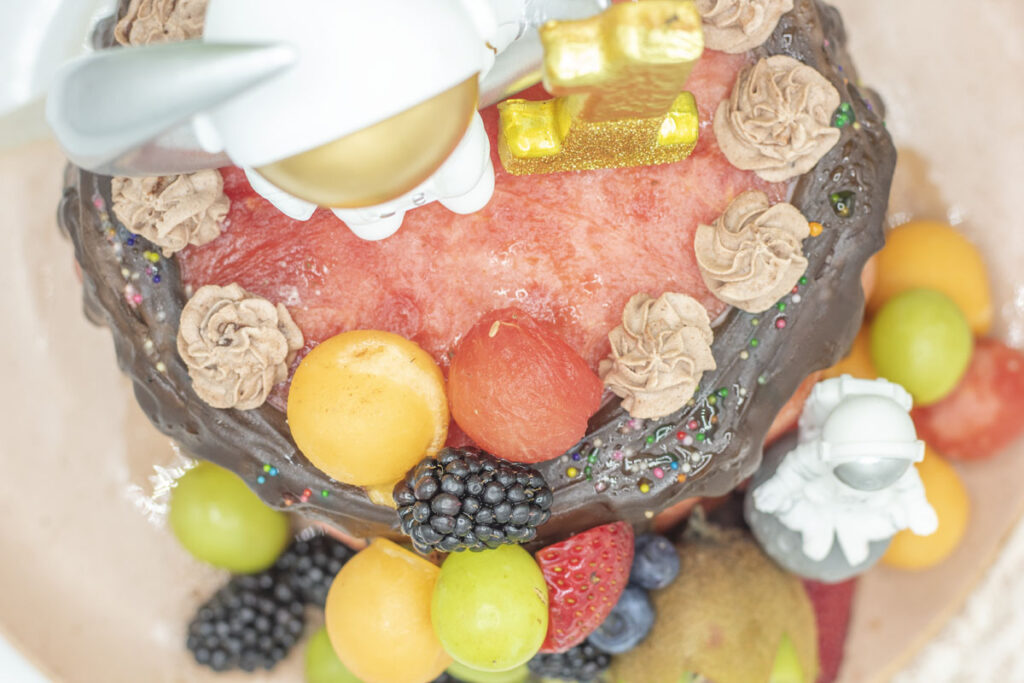
Just make sure to remove the toothpicks before serving your no sugar watermelon cake because no one wants to get stabbed by pointy wood. And while we’re on the subject, also remember the paper towels in between the layers–don’t serve your guests paper!
If desired, you can also top it off or serve it with whipped cream. For this no sugar watermelon cake I highly recommend stabilized whipped cream, especially because of the moisture and potential heat if you’re making this in the summer. I’ll share my recipe for chocolate stabilized whipped cream soon, but in the meantime, if you can’t wait, try Simple Joy’s recipe (non-chocolate), considering that’s what I loosely based my own on.
secrets to success;
Want all the best tips and tricks to make this recipe a success? Check out the blog post above to find out more!
more recipes;
Looking for other recipes perfect for a party alongside this no sugar watermelon cake? Check out these delicious options!
- Looking for a one-batch cookie dough recipe that will let you satisfy even the pickiest eaters? Well this ultimate cookie dough base can be made into 6 flavors–or even more if you think up additional flavors.
- Feeding a crowd? Look no further than my roast beef horseradish party sliders, which you can make in big batches!
- Appetizers are always a hit for a party, so check out some of my favorites. Cheesy buffalo chicken dip is always a fan favorite, or go for these poppable pretzel bites with white cheddar cheese dip.
- Having a magical Harry Potter themed birthday? Don’t worry I’ve got you covered, everything from chocolate covered frogs that sort you into your House, to butterbeer cookies, and more!
watermelon cake;
Equipment
- melon baller
- paper towels
- cake toppers/candles (optional)
- piping bag + 0.2" round tip
- toothpicks
Ingredients
watermelon cake;
- 1 large seedless watermelon* (you may need additional if doing more than 2 tiers)
- 12 oz chocolate candy coating
- sprinkles (optional)
fruit decorations;
- 5 large strawberries
- 8-10 raspberries
- ⅓ cantaloupe
- 1-2 kiwis
- 20 green grapes
- 30 blueberries
- 8-10 blackberries
- other fruits** (optional)
Instructions
watermelon cake;
- (All instructions will be for 2 tiers, see note* for 3). Prepare a large cutting board or sheet pan as your work area to help catch the juices from the watermelon.
- Cut off the top and bottom (it's best to give a couple inches at one end to allow you to melon ball some of the watermelon later.) Cut the large seedless watermelon in two, roughly ⅓ and ⅔ so as to get the base for two rounds.
- Trim each watermelon round but removing the skin and white pith. I start with large cuts, not worrying too much about the white, and then proceed to shave off more and refine into a rounded edge. Repeat with both tiers.
- Drain off as much of the water as you can. (Optional) Allow the watermelon to sit for 15-20 minutes to allow additional drainage before continuing.
- Keep each round separate (don't stack yet). Use a paper towel to blot the surface of each watermelon round, especially the top edges where the chocolate "icing" drizzle will go. Set aside your sprinkles.
- Melt your candy coating according to package instructions and add it to your piping bag with a ⅛" round tip. Pipe the chocolate onto the edge of the first round, squeezing periodically to make drips down the sides. Vary your pressure for more varied drips.
- Quickly toss sprinkles onto the candy coating if using, before the chocolate coating hardens. Repeat for the second round, and allow to solidify. Times may vary depending on the temperature of the watermelon and the ambient temperature.
- I recommend leaving the cake tiers separate for as long as possible to help with drainage. Once ready to assemble, cut or fold a few paper towels and place on your serving plate. Place the large tier down (this will help absorb some moisture as well as keep it from slipping). Then repeat with a smaller paper towel footprint between the first and second tiers.
fruit decoration;
- Prepare your fruit as desired:
- kiwis. Choose to skin the kiwi or not. Then cut a zigzag pattern with a knife around the whole of the kiwi to break it into two halves.
- cantaloupe and watermelon. Use a melon baller to scoop out balls of cantaloupe and watermelon from discarded trimmings.
- berries and grapes. Leave these whole, except for the strawberries if you'd like to make strawberry hearts. Slice a large strawberry in half, and trim the green stem area to be the middle of the heart.
- Decorate as desired by sticking toothpicks into the watermelon cake and arranging fruit in a cascade effect. I followed a vague rainbow pattern.I used toothpicks to stage the larger fruit (melon balls, grapes, strawberries), and then filled in with the smaller and lighter berries if there was enough support from the other fruit. The kiwis are large and heavy, so I propped them up on the plate against the cake.
- Top with additional cake toppers and candles if using. Make sure to remove toothpicks and toppers, and avoid the paper towels when serving.

3 Comments
Laura
September 8, 2024 at 9:32 am
This is the best cake for hot weather, and it’s gorgeous!
spanakopita spinach pie; | Best With Chocolate
October 6, 2024 at 4:57 pm
[…] for a healthy sweet treat to celebrate a birthday? Try this homemade watermelon cake–literally, a cake made out of watermelon and decorated to look festive and still let you blow […]
party chex mix 2 ways; | Best With Chocolate
November 20, 2024 at 9:04 pm
[…] for a festive but healthy way to celebrate? Why not try a watermelon cake on for size! This no-sugar cake is so, so cute and gives you everything to celebrate–without […]
Comments are closed.