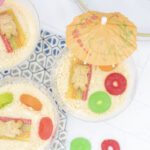
beach bear vanilla dirt cups;
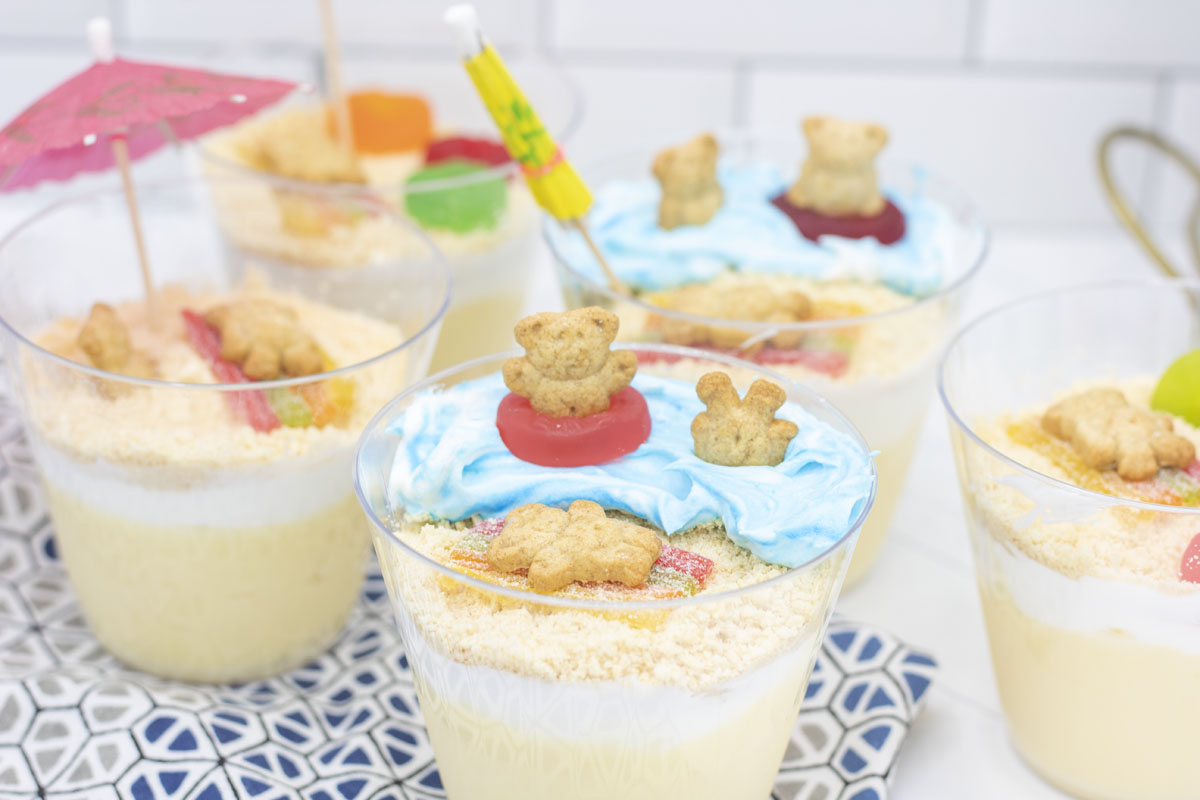

Take your classic chocolate dirt with pudding, oreos, and gummy worms, and give it a bright and sunshiney beach makeover! These beach bear vanilla dirt cups are so stinkin’ cute, and the perfect fun activity and treat for any summer day. Creamy vanilla pudding, cool and light whipped topping, and a sprinkle of golden sand make these cups a delicious layered parfait. Finish out the beach theme with teddy grahams on beach blankets, a couple of drink umbrellas, and maybe a few lifesavers in case the bears fall in!
These beach bear vanilla dirt cups are so stinkin’ cute, delicious, and so easy to make. Start off with your instant pudding mix. Not required, of course, you can use the stovetop if you prefer, but I like quick and easy–the fun is in the assembly! I don’t want to wait for the pudding to cook, but hey, that’s just me.
Vanilla is a classic here, but any white pudding will do. Vanilla, french vanilla, even cheesecake are all delicious options I’ve tried. There are also banana cream and white chocolate options, though they’re less common and may be harder to find. You don’t even have to stick to vanilla dirt cups either. Any flavor that compliments the beach and gives a light and airy flavor will work great in your beach bear vanilla cups.
Mix up whatever flavor pudding you choose and while it sets in the fridge, prepare your other ingredients.
I chose to use gluten-free Golden Oreos, but if I wasn’t trying to consider gluten-free, I’d probably use nilla wafers.
secret to success
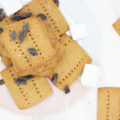
The other “labor-intensive” step (in quotes, because it’s really not) is making your beach “sand”. I chose to use gluten-free Golden Oreos simply because I wanted a gluten-free option. You can also use graham crackers or nilla wafers. They do have gluten-free graham crackers, but they can be fairly expensive and my preferred brands come in small packages, so it adds up pretty fast. If I weren’t trying to consider gluten-free diets, I’d probably use nilla wafers. That way you can skip the step of scraping out all the cream.
Add the cookies to the food processor and blend until a fine powder! To be fair, you don’t have to remove the cream. It will make the sand a little more moist and clumpy. So personally, I think removing the cream gives the best sand-like texture. But I have yet to figure out what to do with the leftover cream so…I’ll report back with a recipe eventually! I hate wasting good ingredients.
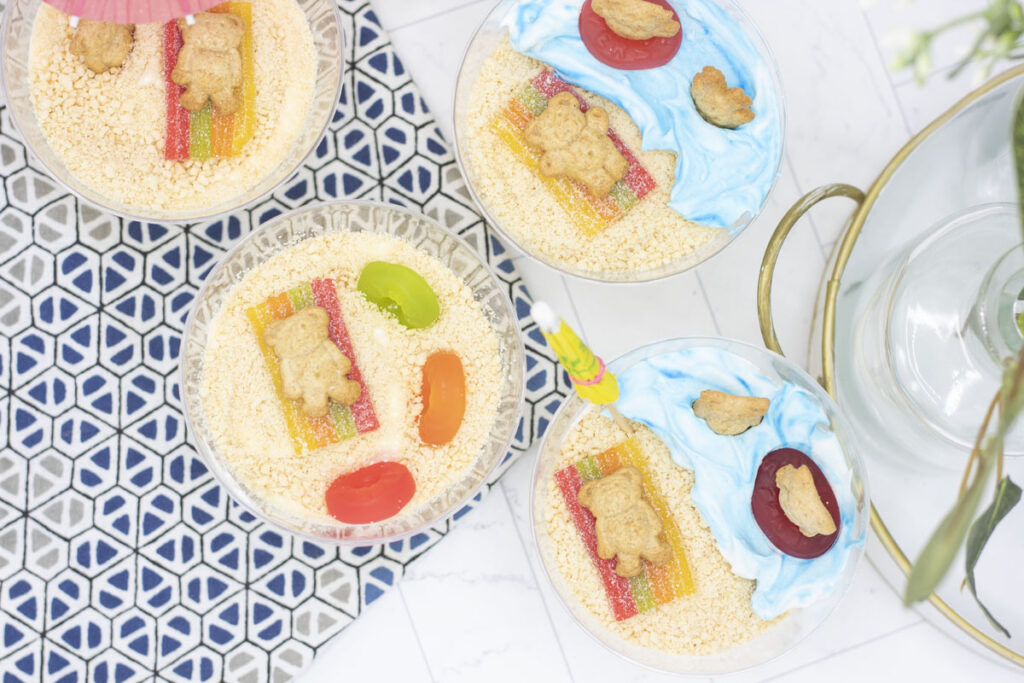
Optionally, you can dye your whipped topping blue for water. If you do, don’t forget to reserve a little to showcase waves washing up on the sand!
secret to success
The next step for your beach bear vanilla dirt cups is optional. If you want to add ode to water, then you have multiple options. You can dye all of your whipped topping blue and include blue in the layer beneath the sand as well as topping. But I typically like leaving a white layer and reserving some tie-dye blue for the ocean scene. Just make sure when you’re filling the vanilla dirt cups, you don’t forget to reserve some whipped topping to showcase waves washing up on the sand!
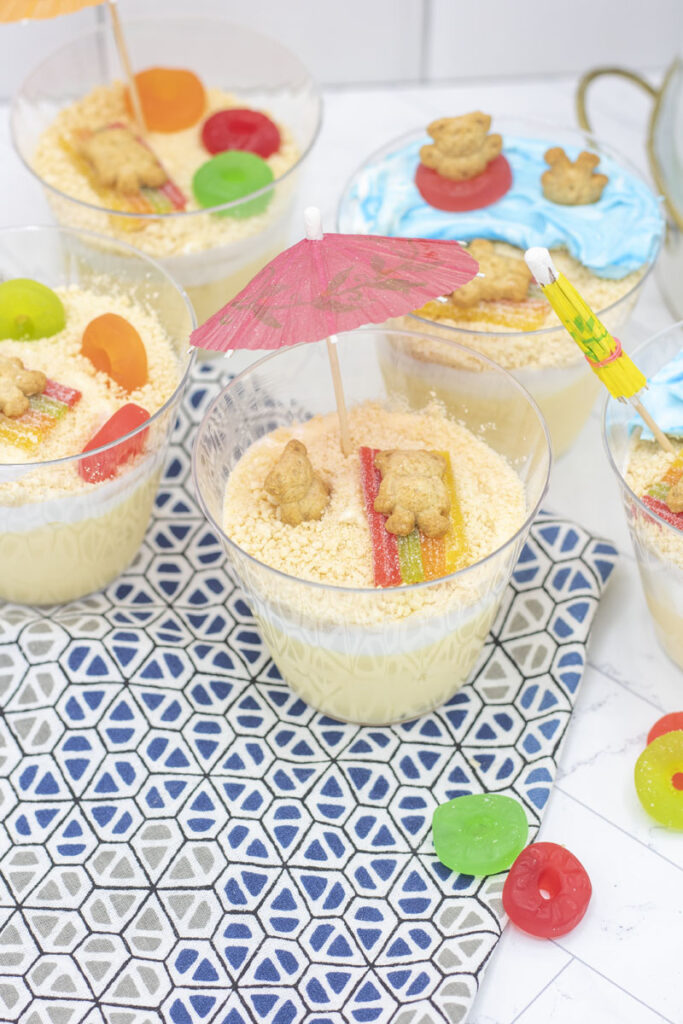
We’ve gone through the three main preparation steps. Once you have the pudding, whipped topping, and oreo sand, you can start building your beach bear cups. Clear cups really show off the layers, and let everyone know what’s in your beach bear vanilla dirt cups. Layer pudding, then whipped topping. Reserve roughly ½-1″ at the top to fill in with Oreo sand.
Of course if you want to go all-in on the beach theme, consider mini plastic beach buckets for your treats! Britni over at Play Party Plan uses these adorable little clear beach buckets for her take on these vanilla dirt cups. And she uses cake to layer as well. But baking a cake, even a boxed cake mix, was a few too many extra steps for me. 😉
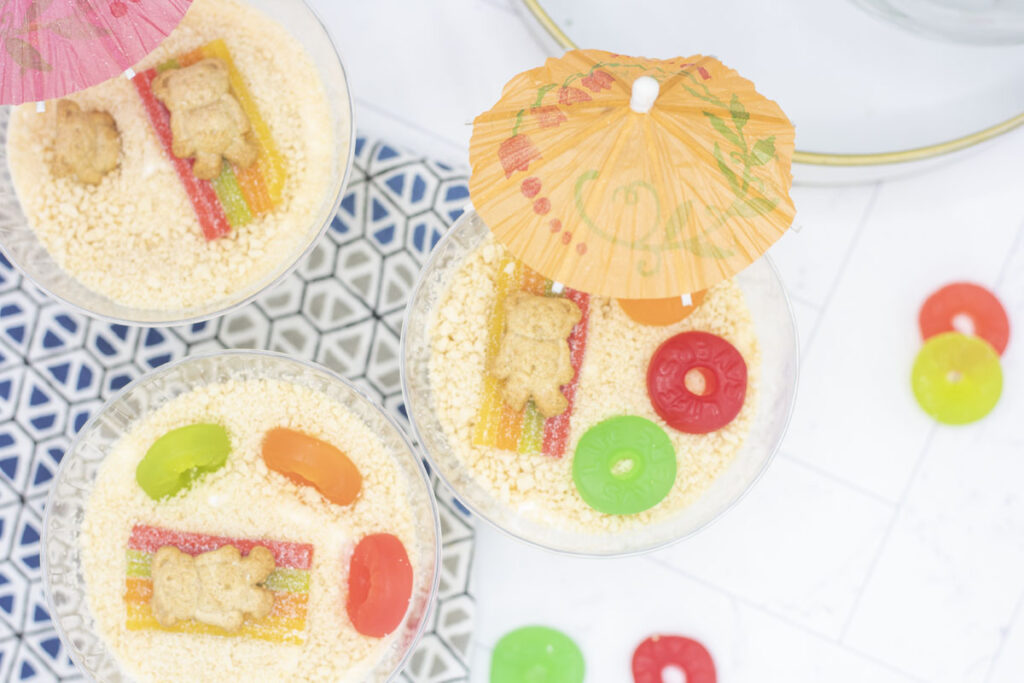
Once you have your layers, fill each beach bear vanilla dirt cup to the top with Oreo sand. Once you’ve filled all, you can start the fun part–assembling your scenes! The beaches are your oyster–make them all alike, or change up the styles. I like some variety in my scenes so they have extra personality, but there might be value in making them all the same if you think, for example, kids might fight over specific ones.
Pro tip: use a tiny bit of the whipped topping as glue to keep the teddy graham on the sour belt towel.
secret to success
If you have a couple of chocolate teddy grahams lying around, I think it’d be hilarious to put some chocolate guys on the blankets, especially those not under umbrellas. Since they’re getting extra tanning they’re super dark! I didn’t really want to buy an entire box of chocolate teddy grahams just to use like 4 though, so I stuck with my light-tanned teddy graham friends. If you had those snack packs though, I’d definitely do it for some laughs!
Here are some examples of the scenes I created, but of course, get creative yourself!
Scene 1: Add a drink umbrella, lay down a towel, and lay a teddy graham on top of the towel. Pro tip: use a tiny bit of whipped topping as glue to keep the teddy graham on the sour belt towel. I like him to have some inner tube lifesavers nearby.
Scene 2: Add a couple of beach towels, and teddies as desired. I’ll put one or two on towels, and stick one feet-first into the sand, like they buried him.
Scene 3: If you choose to have water in your scene, add a teddy graham to the center of the lifesaver so its feet stick through and plop him in the water. I like adding a teddy bear upside down into the water like he’s diving in! Or add a gummy shark to chase him in the deep!
Scene 4+: Get creative! Make your own scenes, or find fun novel candies like gummy flip flops, sea glass or rock candy, or anything else beachy you can think of!
secrets to success;
Want all the best tips and tricks to make this recipe a success? Check out the blog post above to find out more!
more recipes;
Looking for other recipes to beat the summer heat? Check out these cool options:
- For a sweet and refreshing dessert/drink, try my reverse strawberry shortcake. Heavy on the cool strawberry smoothie with just a light smattering of toasted pound cake makes this light and delicious!
- Relive the golden childhood days with these cosmic brownies–now two ways! White chocolate cosmic blondies, and classic cosmic brownies.
- Summer means strawberry picking, and if you have lots of strawberries, you sure to need to get your hands on my 5 favorite summer strawberry recipes!
- Or looking for some cookout or potluck recipes as you hang out with friends! My best burger rub recipe is always a hit on the grill, or check out my 10 favorite summer recipes for even more ideas.
beach bear vanilla dirt cups;
Equipment
- 10 plastic cups
Ingredients
vanilla dirt cups;
- 2 3.4oz pkgs instant pudding mix (vanilla, french vanilla, cheesecake, etc.)
- 4 cups milk (or as needed for pudding instructions)
- 1 package golden oreos (optionally, sub nilla wafers or graham crackers. I used gluten-free oreos)
- 8 oz whipped topping thawed
- blue food coloring (optional)
beach bear toppings;
- 25 honey teddy grahams
- 20 gummy lifesavers
- sour belts (airheads xtremes or like for rainbow towels)
- 10 drink umbrellas
- any other toppings! (gummy sharks, gummy starfish, etc.)
Instructions
vanilla dirt cups;
- Mix together instant vanilla pudding and 4 cups milk (or follow package instructions). Whisk together until no lumps remain and refrigerate until set.
- Meanwhile prepare your sand. Remove cream from the oreos and add cookies to a food processor. Blend until fine grained sand, and set aside.
- Optionally, create your water. You have two options here, add drops of food coloring to the entire tub of whipped topping and mix to make a solid blue color. Or, reserve roughly a ½ – 1 cup of whipped topping and add drops of blue food coloring to swirl in blue food coloring for a tie-dye look.
- Assemble your cups. Layer pudding, then whipped topping, then pudding until cup is mostly full. Leave roughly 1" at the top. Add a layer of oreo "sand", making sure to leave at least ½" at the top for your scene. Repeat for all 10 cups.
beach bear toppings;
- Assemble the beach bear scenes. I like some variety, so some cups have slightly different scenes. All units for the ingredients here can be tweaked depending on how consistent you want the scenes.
- Using scissors or a knife, trim the sour belts to roughly 1¼" lengths to create towels.
- Assemble your scenes by adding drink umbrellas, towels, teddy grahams, and lifesavers on each of your beach bear dirt cups. If you chose to have water in your scene, then add some gummy sharks for good measure!