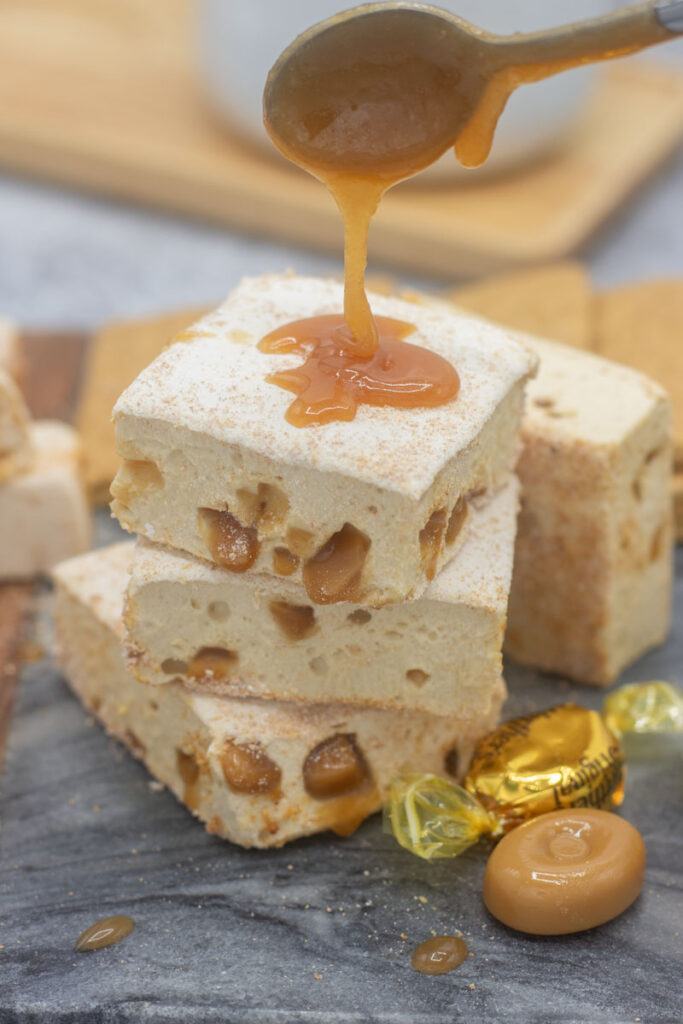
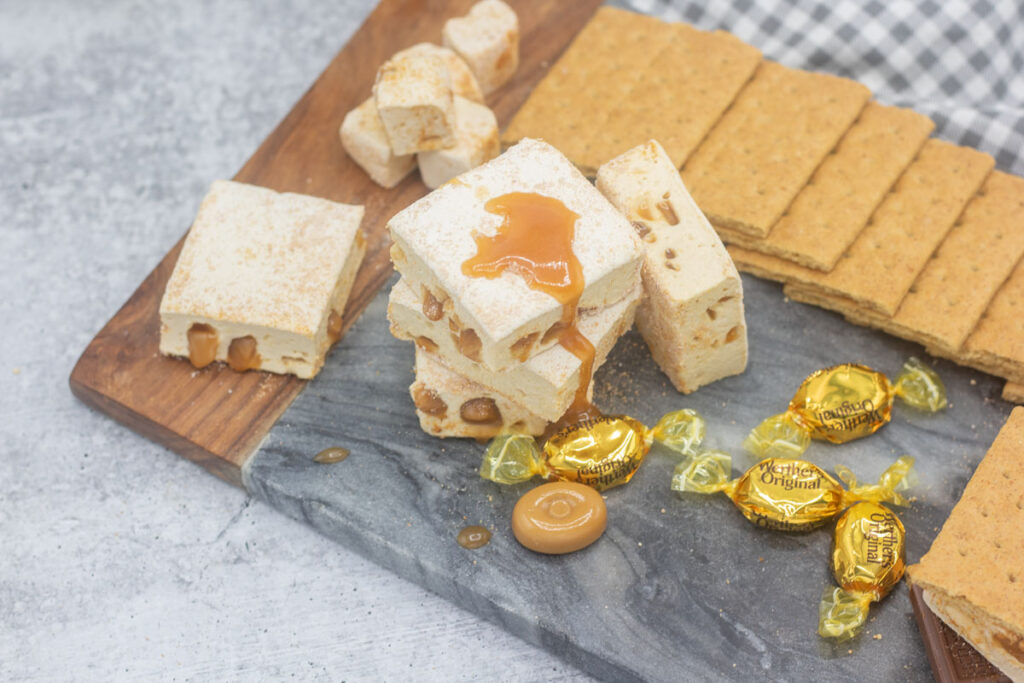
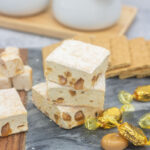
caramel crunch marshmallows;


These homemade caramel crunch marshmallows are fluffy, buttery soft, and so, so good. The marshmallow itself is a caramel marshmallow, and then there are crushed caramel toffee bits throughout to add pops of butter caramel flavor. They’re soooooo yummy.
The thing about marshmallows is, if you know how to make one marshmallow, you know how to make a hundred flavors. So if you know how to make my homemade marshmallow s’mores with a vanilla bean marshmallow, you know how to make these caramel crunch marshmallows.
The difference here is pretty much relegated to: brown sugar in addition to white sugar; and instead of corn syrup, use a caramel dip. The caramel dip is what makes the caramel base for the marshmallow.
the Manzetti caramel dip is essentially a different invert sugar so you can swap it in 1:1 for corn syrup to make a caramel marshmallow.
Secret to success
Without going too far down the technical rabbit hole, marshmallows need what’s called an invert sugar. It’s a liquid sweetener that uses an acid or enzyme (e.g. lemon, invertase) to break down the sugar into a super sweet form that is also generally shelf-stable. Typically, I use light corn syrup for this in a lot of my candy recipes (caramels, marshmallows, etc.). But the Manzetti caramel dip is essentially a different invert sugar, so you can swap it in 1:1 for corn syrup to make a caramel marshmallow.
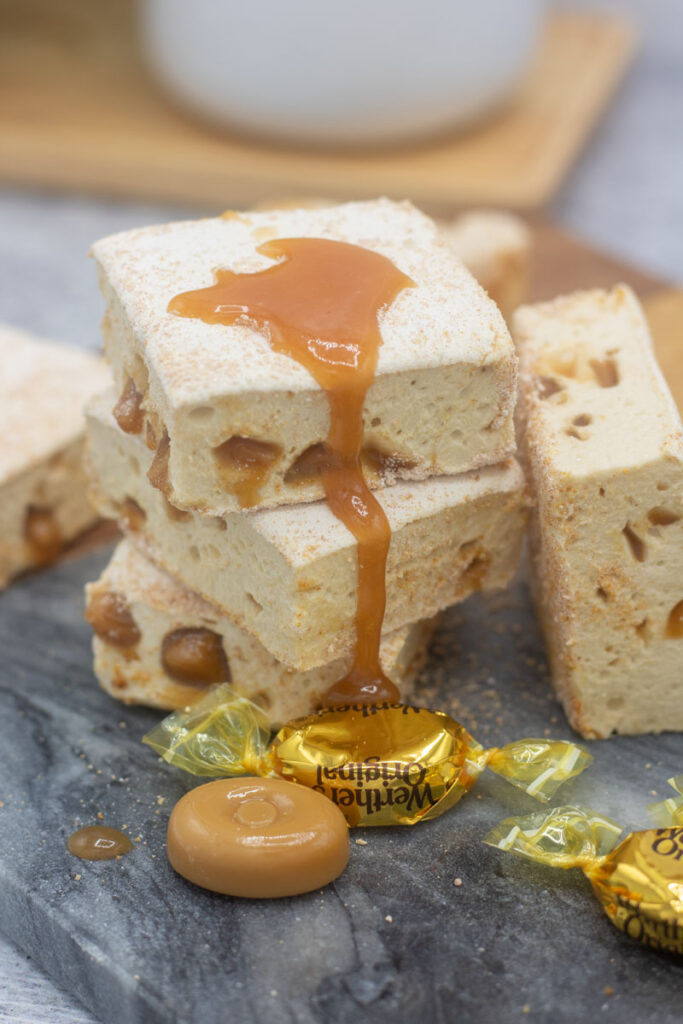
Caramel crunch marshmallows wouldn’t have their name with caramel crunch bits. For the crunch bits, go for Werthers Original caramels. Breaking hard candies always intimidates me. I always think of a rolling pin or blender (or food processor), but I don’t want to damage anything. The sharp edges of the broken candy can mar a rolling pin’s surface, and I don’t want to dull the blades of a blender or food processor.
The trick here is to make the caramels extra brittle and easier to crush. Hint: freezer. Unwrap your caramels and pop them in the freezer for 30+ minutes. Then I add them to a plastic bag and smash them 1-2-3 with—usually—my meat mallet. Okay, it probably takes a few more than 3 hits, but keep smashing ’til the chunks are small and toffee bit-sized.
The trick to smashing caramels is to make them extra brittle and easier to crush. Hint: freezer!
Secret to success
You don’t have to use a literal hammer either—the rolling pin still works, or pretty much any hard, flat surface. Even the bottom of a sturdy cup or glass can work, but just make sure it’s robust enough not to crack or break. I’d probably opt for a ceramic glass over a glass cup if possible. Be safe!
If you freeze the caramels, it should take pretty quick work. I will say the sharp edges of the broken caramel can kinda poke holes in a plastic bag. If I’m feeling adventurous, I just use the plastic bag, but for a slightly tidier option, I’ll place a clean kitchen towel over the bag, just to stop any pieces from breaking through the plastic and flying around.
I add the caramel crunch bits immediately to the marshmallow after whipping and right before I’m ready to transfer the marshmallows to the prepared pan. They’re essentially the last thing I add, and I let the mixer fold them into the batter for me. Then, moving quickly, transfer the caramel crunch marshmallows to a prepared pan.
Do not forget to grease your pan! Use a neutral-flavored oil to keep the caramel flavor front and center, and make it easy to release the marshmallow from the pan. I typically will use whatever spray I have lying around. You want a neutral flavor, so I typically stay away from olive oil, sesame oil, and the like. Pam, avocado oil, canola oil, etc. are all good choices. I find it easiest to use a spray, but in a pinch, just add a drizzle of oil to your 9″x13″ pan and use a paper towel to spread generously on the bottom and up the sides of the pan.
Do not forget to grease your pan! Use a neutral-flavored oil to keep the caramel flavor front and center, and make it easy to release the marshmallow from the pan.
secret to success
For added ease, I often will add a splash or spray of oil to the bottom of the pan and use a piece of parchment paper to line the dish. Just make sure you then grease the parchment paper again. The first layer helps stick the parchment paper to the pan, and the second coat is to make sure the marshmallows don’t stick. The goal is to get your caramel crunch marshmallows out as easy as possible. Marshmallows are sticky if you don’t prepare!
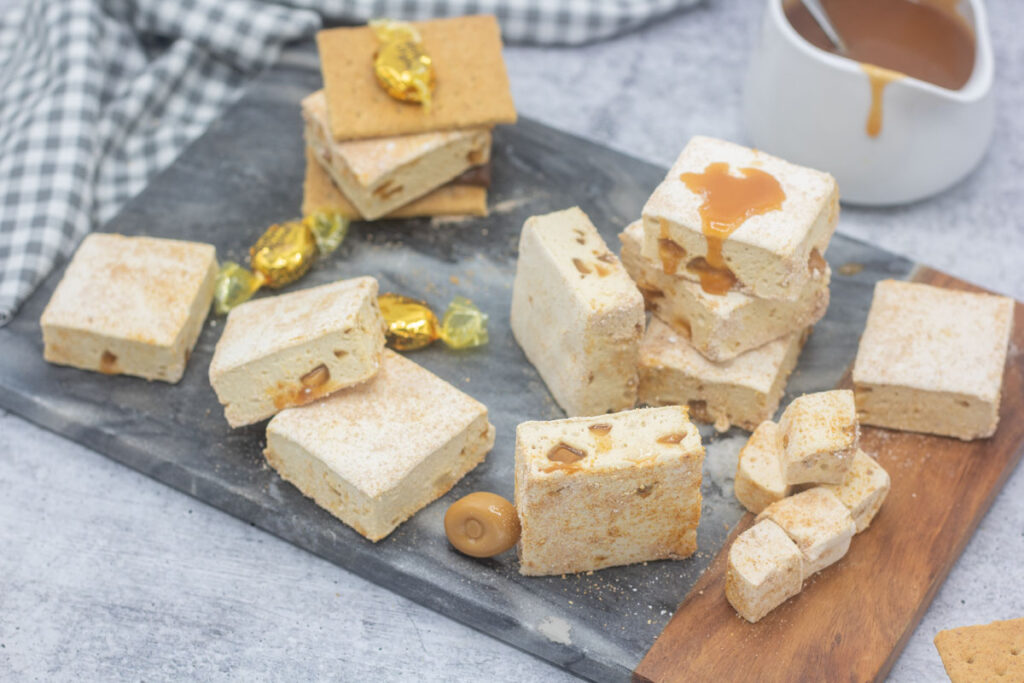
The fun part about homemade caramel crunch marshmallows is how to eat them! Eat them straight and you’ll get the full experience of soft, luscious marshmallow in your mouth with little pops of caramel crunch. Toast them and throw them on graham crackers with chocolate for s’mores! Add to hot cocoa when you need a little jeuje in the cold weather. Or even make rice krispies treats out of them! So, so yum. In any form.
secrets to success;
Want all the best tips and tricks to make this recipe a success? Check out the blog post above to find out more!
more recipes;
- Love marshmallows? Check out these classic vanilla bean marshmallows I use to make homemade marshmallow s’mores, or check out some fun flavor twists like churro marshmallows or raspberry marshmallows.
- If you love marshmallows, you gotta love s’mores! Try these bulk sheet pan s’mores to make s’mores for a crowd with these caramel crunch marshmallows.
- Other fun ways to use up caramel crunch marshmallows include topping s’mores cheesecake, or using them for decoration on a french silk pie.
caramel crunch marshmallows;
Equipment
- stand mixer OR hand mixer
- digital thermometer strongly recommended
Ingredients
caramel crunch marshmallows;
- 2 Tbsp unflavored gelatin (3 envelopes, 21g)
- ½ Tbsp vanilla extract (alt, sub an additional ½ Tbsp vanilla extract in lieu of the vanilla bean paste if unavailable)
- ½ Tbsp vanilla bean paste (or scrape the seeds of a vanilla bean)
- 1 cup cold water (divided)
- 1 cup white sugar
- 1 cup dark brown sugar
- ½ cup marzetti caramel dip
- 1¼ tsp salt
- unflavored cooking spray (to grease the pan; can also use lard, butter, or mild flavored oils like canola oil)
dusting mixture;
- 1 Tbsp cornstarch for dusting
- 1 Tbsp powdered sugar for dusting
- 2 Tbsp nonfat milk powder toasted
Instructions
caramel crunch marshmallows;
- Spray a 9"x13" pan lightly with unflavored oil to prevent sticking.
- Add ½ cup cold water and 2 Tbsp (3 envelopes, approx 21g) gelatin into the bowl as you whisk lightly to incoporate it so it doesn't clump.
- In a heavy saucepan, add remaining ½ cup cold water, 1 cup white sugar, 1 cup brown sugar, ½ cup caramel dip, ¾ tsp salt. Cook over low heat, stirring gently until sugar dissolved.
- Increase heat to medium and boil without stirring until mixture reaches 240°F, about 12 minutes. As soon as it reaches the right temperature remove from the heat.
- Begin whisking the bloomed gelatin on slow speed. Pour the sugar mixture over the gelatin bloom stirring until dissolved evenly. Then add the remaining sugar mixture.
- Beat mixture on high speed until white, thick, and nearly tripled in volume. This should take approximately 6-8 minutes in a stand mixer, and roughly 10 minutes with a hand mixer.
- Working quickly, spread mixture into the prepared baking pan and smooth with an oiled spatula.
- Allow to stand, uncovered for at least 24 hours up to three days, depending on desired moisture content and texture.
dusting mixture;
- In a small pan, add 2 Tbsp nonfat milk powder. Toast on medium-low heat, stirring occasionally. Cook until brown and toasty, then remove from the heat.
- To the toasted milk powder, add in 1 Tbsp powdered sugar and 1 Tbsp cornstarch and mix until blended.
- Once the marshmallow has set for 1-3 days, cut into desired shapes and dust the marshmallows on all sides with the milk powder mixture. This prevents clumping and will also help dry the surface a bit.
- Store in an airtight container for up to 5 days. The marshmallows will continue to dry and get firmer over time and the caramel toffee bits will get less crunchy over time as well.
1 Comments
Kayden
September 21, 2025 at 10:48 am
Delicious! Perfect for s’mores!