pumpkin patch dirt cookies;
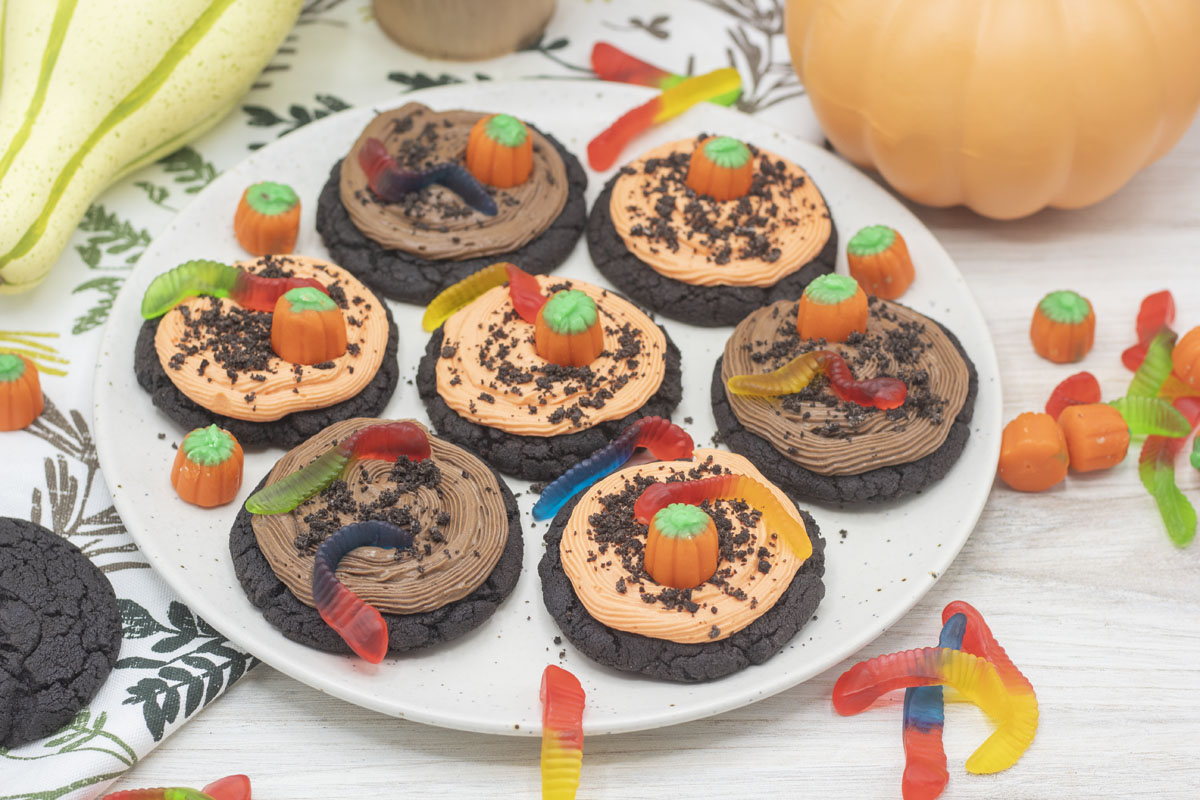
These pumpkin patch dirt cookies are just the cutest little Halloween treat. The recipe makes a big batch, and I have to say, captures the essence of dirt cups in a cookie form. Even just cracking the lid on these gives you a whiff of that iconic Oreo chocolate flavor, and I give you both vanilla and chocolate options for the pudding icing.
The dirt cookies themselves are the perfect base. They basically taste like mildly chewy Oreo cookies though they soften over time when iced. They have chewy centers with just barely crisp edges and while not overly sweet, the sugary pudding icing balances out the less-sweet dirt cookies.
The key is the black cocoa powder. What is black cocoa powder? Well, let’s start with regular cocoa powder. Cocoa powder is made from finely ground dried cocoa solids and is very bitter because there’s no added sugar. Dutch-processed cocoa powder is cocoa powder from cocoa beans soaked in an alkaline solution of potassium carbonate. This removes some of the bitterness so it has a mellower flavor. Black cocoa powder is super Dutch-processed cocoa powder to the extreme. So much so that it becomes black in color.
The key to the Oreo flavor of these perfectly chewy cookies is black cocoa powder.
Secret to success
So, before you ask—no, it’s not the same to substitute other cocoa powders for the black cocoa powder here. I get mine from King Arthur Flour, though of course there are other brands out there. If you really can’t find black cocoa powder I would use a high quality Dutch-processed cocoa powder, but it won’t be the same result as using black cocoa powder.
No, it’s not the same to substitute other cocoa powders for the black cocoa powder here.
Secret to success
Note that this recipe makes a laaaarge batch. Like 30 cookies large. And I make each cookie with two scoops of my standard-size cookie scoops. I press each pair of cookie dough balls together and lightly flatten them before laying them out on the cookie sheet.

The dough itself seems just a tiny touch dry. As I ball and flatten each cookie, the edges will crumble ever so slightly. If some bits come loose I just add them back in and reform the cookie. They will spread a little bit in the oven, but not much, which is why we want to flatten them some before they even get in the oven.
Make sure your dirt cookies cool fully before dressing them up as a pumpkin patch. The icing is the perfect consistency—pudding-like in texture and flavor, but solid enough to retain enough shape that it doesn’t bleed and drop off the edges. But all bets are off if your cookies are hot. In fact, I prefer to make the cookies and prepare the icing but not assemble the cookies until the day before serving.
Pumpkin patch dirt cookies will technically keep in the fridge for up to 4 days iced, but the longer they sit, the softer the cookies will become.
secret to success
The pumpkin patch dirt cookies will technically keep in the fridge for up to 4 days iced, but they’re really best fresh. The longer they sit, the softer the cookies will become. Nothing wrong with that, they’re still delicious, but I personally like a little chew to the dirt cookies and the soft and silky pudding icing. Make sure you refrigerate the cookies though, since the pudding icing has cream in it.
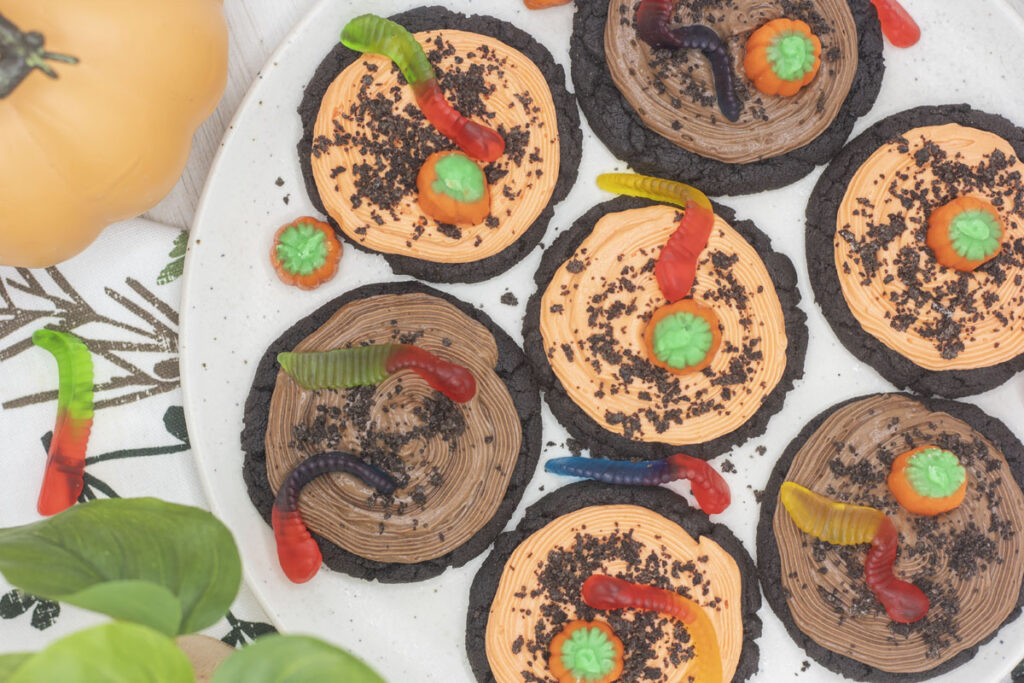
Chocolate is the traditional dirt cup flavor, for all its dark and muddy-like, well, dirt. But I took Salt and Baker’s Dirt Cake Cookies recipe and had to Halloween it up. So for this batch, I made vanilla “pumpkin-patch” pudding icing, and of course, had to color it thematically orange. Sure it’s not your traditional dirt color, but it’s still tasty as all heck!
You don’t even have to stick to chocolate and vanilla pudding icings. Use pistachio and go for a witchy theme!
secret to success
I honestly wish there was an orange instant pudding easily available, because I think orange or creamsicle flavors would go well with the uber dark chocolate cookies. But it wasn’t in the cards so I went with a classic vanilla that pairs nicely with the dirt cookies. Especially as we all know cookies and cream go beautifully together!
You don’t even have to stick to chocolate and vanilla—explore other pudding flavors too! A green color would go well for a witchy theme, and then decorate with candy eyes and worms and all sorts of nasty (and delicious) gummy things.
I did use piping bags and tips to pipe the icing on, but you don’t really need to. You could just as easily grab a spoon and start smearing if needed. You can also go more heavy-handed on the cookie crumble dirt and cover it up even more so no one will know your icing technique at all! That said, I actually like to use piping bags because I can store the icing in the piping bags to refrigerate for multiple days. This means I can store the cookies and icing separately but still quickly assemble the cookies when I want or need to.
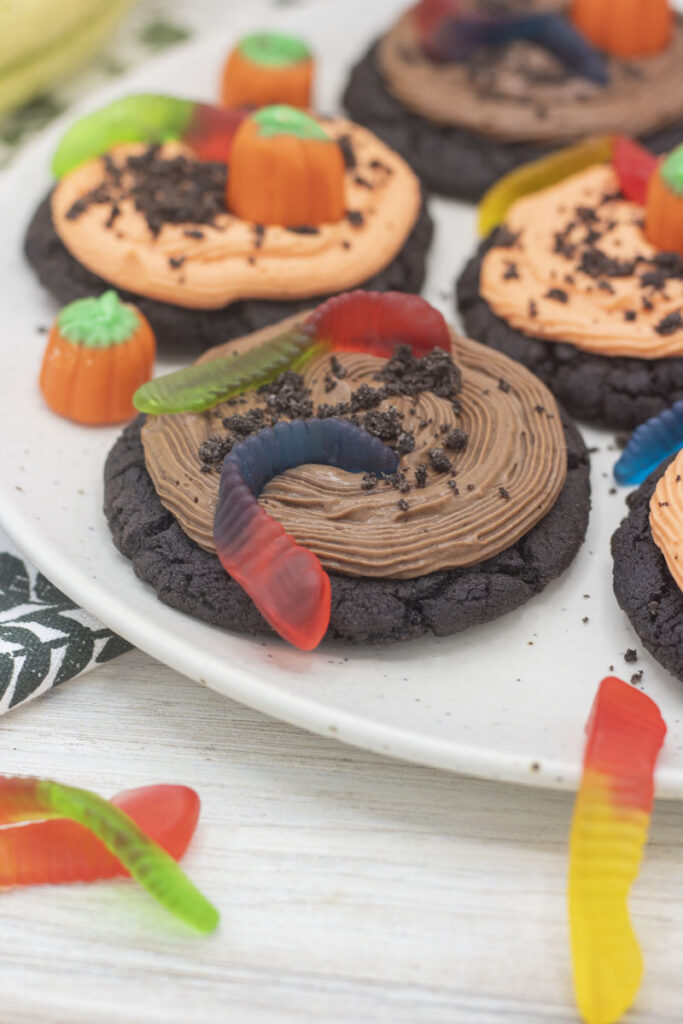
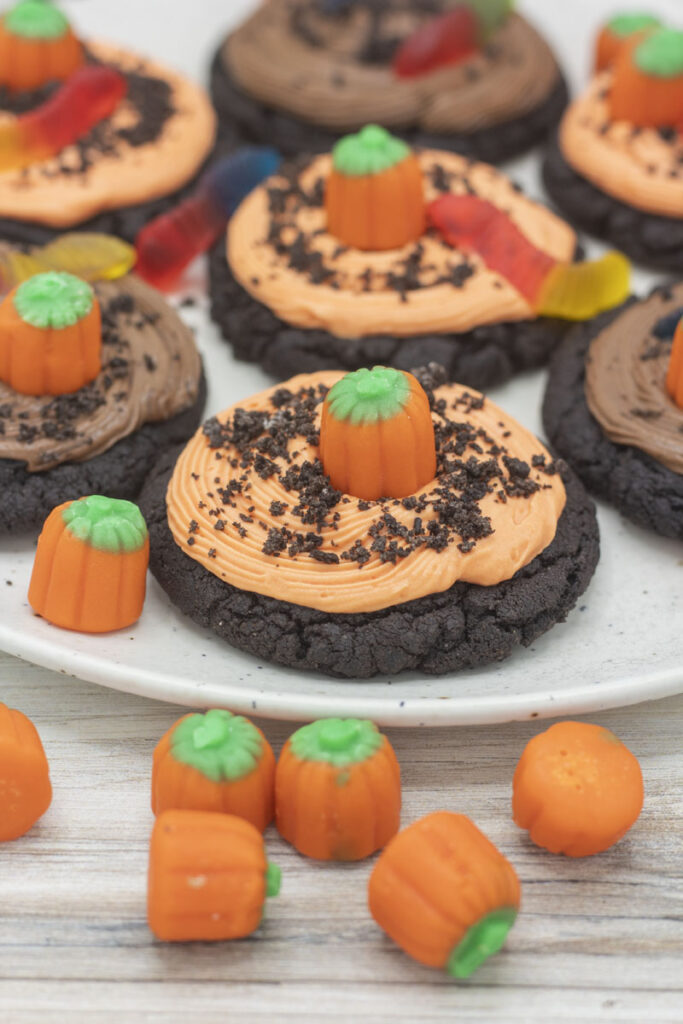
When it comes to toppings—get creative! Make sure to reserve some of your cookie crumbs to use as “dirt”. Hey the “dirt” in dirt cookies has to come from somewhere. To make pumpkin patch dirt cookies, you need some pumpkins! I used the candy corn pumpkins that seasonally make their way to shelves in our area and I think they came out to be a great size for the cookies.
And of course, it’s not a dirt cookie unless there are gummy worms. They offer a contrasting texture and burst of bright fruity flavor every so often in your mouth. So arrange your gummy worms to maximum dirtiness. For the most part I added one pumpkin and one to two gummy worms to each cookie, but added a few with only worms or only pumpkins for variety.
secrets to success;
Want all the best tips and tricks to make this recipe a success? Check out the blog post above to find out more!
more recipes;
Looking for other Halloween and fall-themed recipes?
- Check out the full list of my favorite fall recipes–everything from pies, to soups, to pumpkin bread and more!
- Make your own pumpkin spice truffles to top your pumpkin patch dirt cookies if you’re feeling up to the task!
- Check out these adorable summer beach bear vanilla dirt cups, decorated with teddy grahams living it up on their little beachy scene with life savers and little gummy towels and umbrellas,

pumpkin patch dirt cookies;
Ingredients
oreo cookies;
- 1½ cups unsalted butter (softened to room temperature)
- 1½ cups light brown sugar (packed)
- 1 cup granulated sugar
- 2 large eggs
- 1 Tbsp vanilla extract
- 3 cups + 2 Tbsp all-purpose flour
- 1 cup black cocoa powder
- 12.08 oz Oreo crumbs – divided (I used 1 package of gluten free oreos, regular not double stuff, reserving roughly ¼ cup of crumbs)
- 1½ tsp baking soda
- 1 tsp baking powder
- 1 tsp salt
pudding frosting;
- 3.9 oz instant pudding (chocolate or vanilla)
- 2 cups heavy cream (cold)
- ⅓ cup milk (cold, I used 2%)
- ⅔ cup powdered sugar
- 1 teaspoon vanilla extract
- ⅓ cup Dutch process cocoa powder (for chocolate frosting)
- orange food coloring or red + yellow food coloring (for vanilla frosting)
toppings;
- gummy worms
- ¼ cup oreo crumbs (remaining from cookie base)
Instructions
oreo cookie base;
- Preheat oven to 365°F. Line a baking sheet with parchment, set aside.
- In a large bowl, cream together 1½ cups softened butter, 1½ cups brown sugar, and 1 cup sugar until evenly mixed. Add in 2 eggs and 1 Tbsp vanilla, scraping down the sides of the bowl to make sure everything is evenly incorporated.
- Add in 3 cups + 2 Tbsp flour, 1 cup black cocoa powder, and oreo crumbs (reserving roughly ¼ cup for topping later. Add in 1½ tsp baking soda, 1 baking powder, and 1 tsp salt. Mix to combine.
- Portion the dough into large 2 Tbsp cookies and roll into balls. Stagger the balls on the baking sheet, making sure to leave plenty of room between each cookie. Press down on each cookie dough ball slightly to flatten. Bake for 10 -12 minutes, the edges will appear set but the centers should appear soft.
- (Optional) Clean up the edges of your cookies. Use a very large round biscuit cutter or cookie cutter, big enough to surround the cookie and still have some space left over. Gently move the cutter in a circular motion (think hula hoop) to help tuck the edges into a nice round shape.
- Remove from the oven and let cool on pan for 5 minutes then transfer to parchment paper or a rack to cool completely.
- Best served fresh, but cookies can be frozen in an airtight container (I've used ziplock bags doubled up with air pressed out of both) for up to a month, and thawed in the fridge overnight when ready to serve.
pudding frosting;
- Chocolate pudding frosting (only): Combine 2 cups heavy cream, ⅓ cup cold milk, ⅔ cup powdered sugar, 1 tsp vanilla, ⅓ cup Dutch-processed cocoa powder, and one 3.9oz instant chocolate pudding mixture in a large bowl. Using a hand or stand mixer, beat until smooth and thickened.
- Orange vanilla pudding frosting (only): Combine 2 cups heavy cream, ⅓ cup cold milk, ⅔ cup powdered sugar, 1 tsp vanilla, ⅓ cup Dutch-processed cocoa powder, and one 3.9oz instant vanilla pudding mixture in a large bowl. Using a hand or stand mixer, beat until smooth and thickened. Add in orange (or red + yellow) food coloring and mix until desired color is achieved, adding more color if needed.
- Both chocolate and orange vanilla pudding frosting:Combine 2 cups heavy cream, ⅓ cup cold milk, ⅔ cup powdered sugar, 1 tsp vanilla in a large bowl. Using a large hand or stand mixer, beat until smooth. Remove half the mixture to a separate bowl. In one bowl add in ~2oz chocolate pudding mixture (half the box) and 2½ Tbsp cocoa powder and beat with mixer until smooth and thickened. In the second bowl add in ~2oz vanilla pudding mixture (half the box) and add orange (or red + yellow) food coloring and beat until smooth and thickened. Add more food coloring and re-mix if needed to achieve desired color.
- Pudding frosting can be made in advance and stored in an airtight container or pastry bags in the fridge for up to 3 days.
dirt cookies;
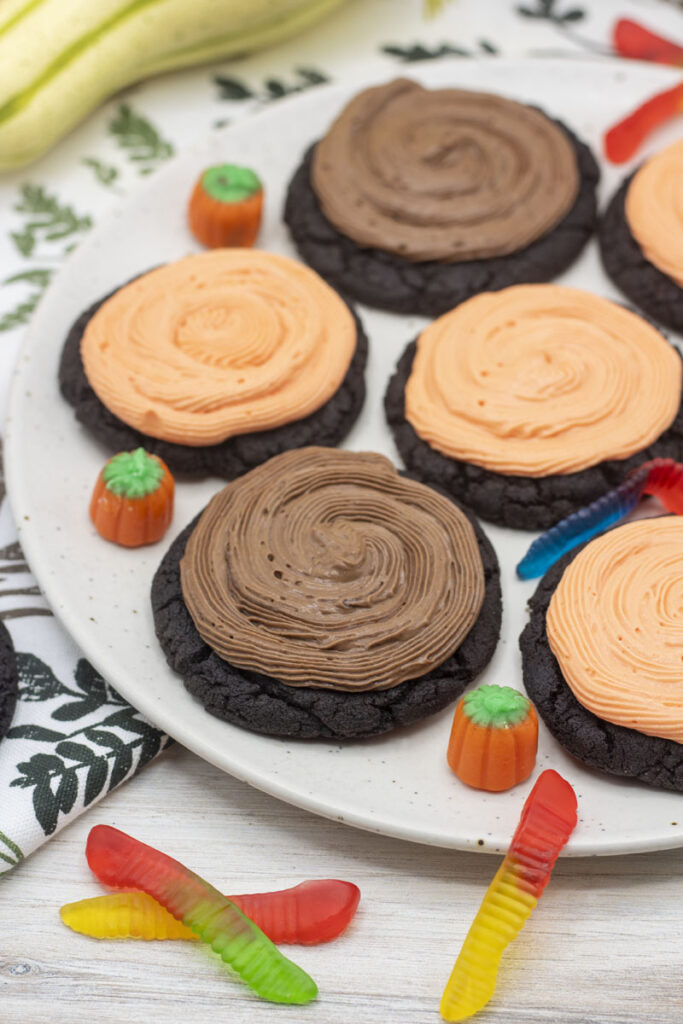
- Start assembly by frosting the cookies. For a rustic look, you can just spoon icing onto each cookie. For a more polished look, transfer frosting to a pastry bag with a tip of your choice and pipe icing onto each cookie in a spiral.
- Assemble the toppings by sprinkling reserved crushed oreos on each frosted cookie as "dirt". Decorate with gummy worms and candy pumpkins as desired.
- For best results (in my opinion) frost and serve cookies within 24 hours so the cookies retain a little bit of chew. If planning to assemble in advance, frost the cookies and sprinkle with oreo "dirt". You can store frosted cookies in the fridge for up to 3 days, but the cookies will soften as they sit. Wait to add gummy worms and pumpkins until just before serving or they may bleed colors on your icing.




1 Comments
Laura
October 26, 2024 at 5:32 pm
Fun to make and delicious!
Comments are closed.