strawberry mochi;
Originally posted on November 23, 2016. Updated February 4, 2022 for content and clarity.
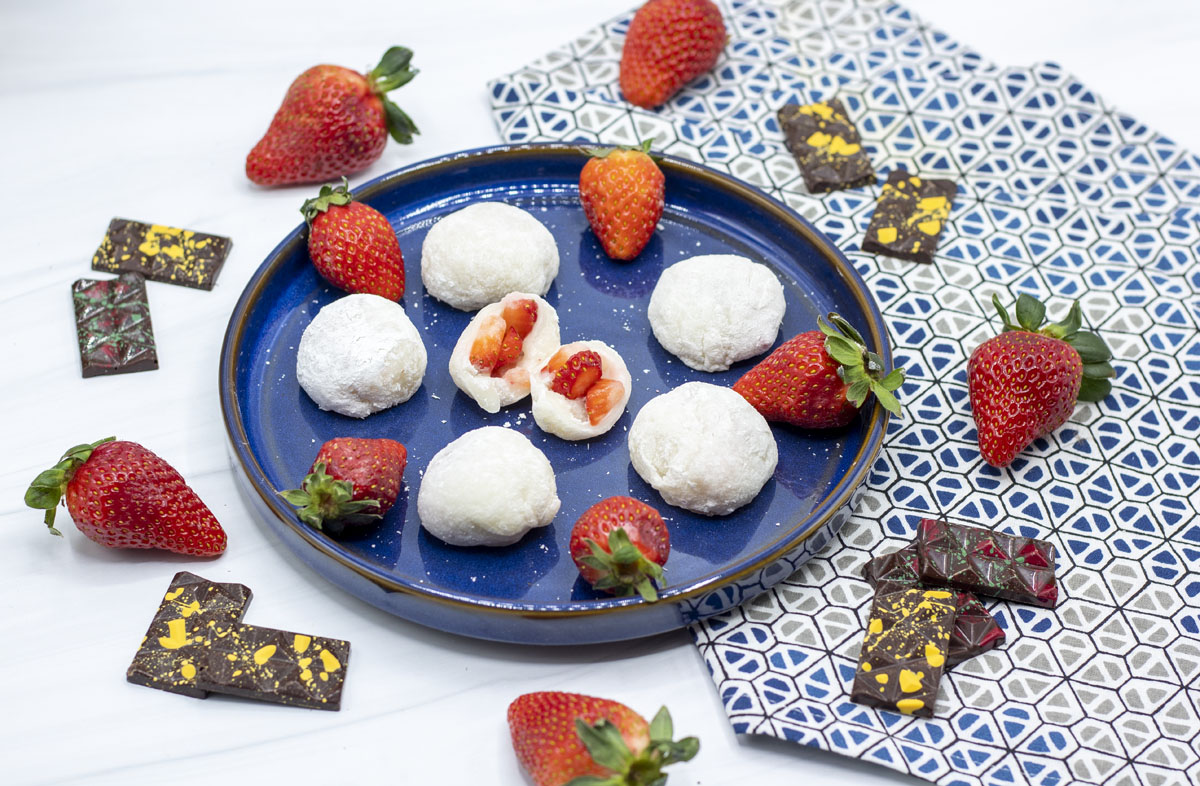
I originally shared a recipe for ice cream mochi, but this time I’m back with a soft and chewy treat for Valentine’s Day: strawberry mochi! If you don’t know what mochi is, let me explain. It’s a very soft sticky and chewy dessert, stuffed with sweet fillings. Using glutinous rice flour and the microwave, you can make this treat fresh for yourself at home. Oh and I should point out that “microwave” bit–makes this a no bake recipe!
You can stuff anything in mochi dough. The traditional is typically anko, or red bean paste but I’m not a fan. So I gravitate much more toward ice cream mochi, or peanut mochi, or chocolate mochi. I’ve even seen a social media video of “mochi roulette” where they taste test various mochi that the mother has stuffed a wide variety of fillings into. (Think delicious fillings like kiwi, strawberry, or chocolate, but then a few awful flavors like wasabi, mustard, or chicken.)
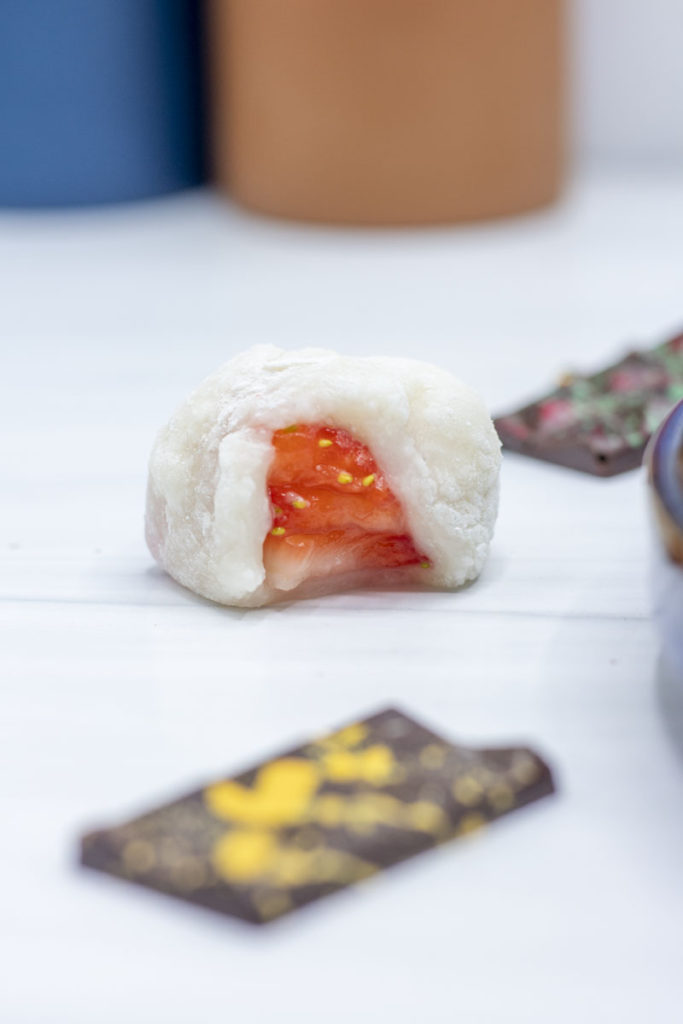
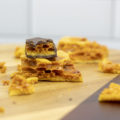
But for Valentine’s Day we have to have some red, and strawberries are always a delicious choice. I choose fresh strawberries because they’re so juicy and flavorful, and add a lovely brightness and lightness to the mochi.
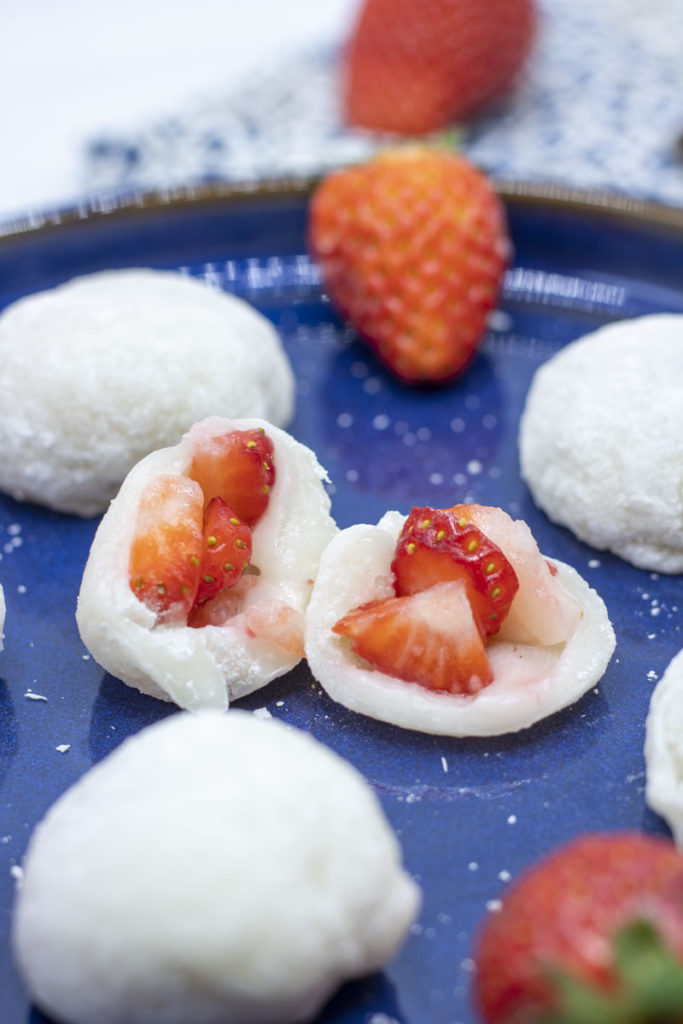
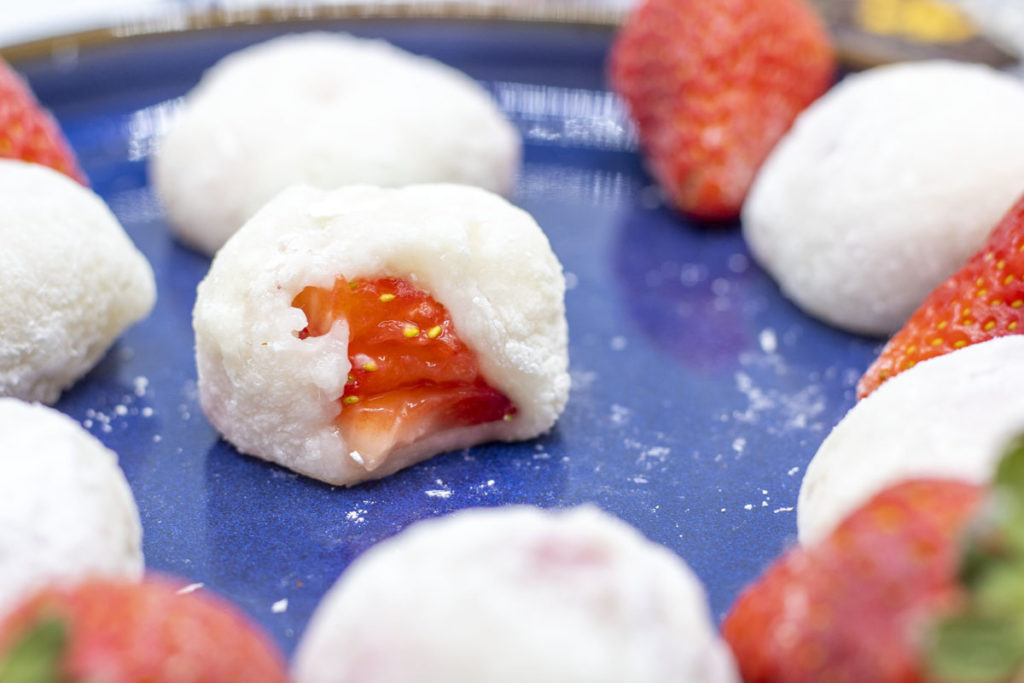
Keep in mind that fresh strawberries, especially when cut, are juicy and moist. So to use fresh fruit in mochi you’re going to want to eat these right away. They won’t exactly melt before your eyes, but I’ve let mine sit overnight and they’ve deflated into a pool of soggy mess. Still delicious but far less appetizing and 100% less finger food. So be warned! They’ll keep for 10 hours or so, but if you’re not planning to use them for a while, pop them in the freezer, or risk a gloppy unappetizing mess! Plus the nichi dough is really satisfying to chew through when it’s just thawing from being frozen.
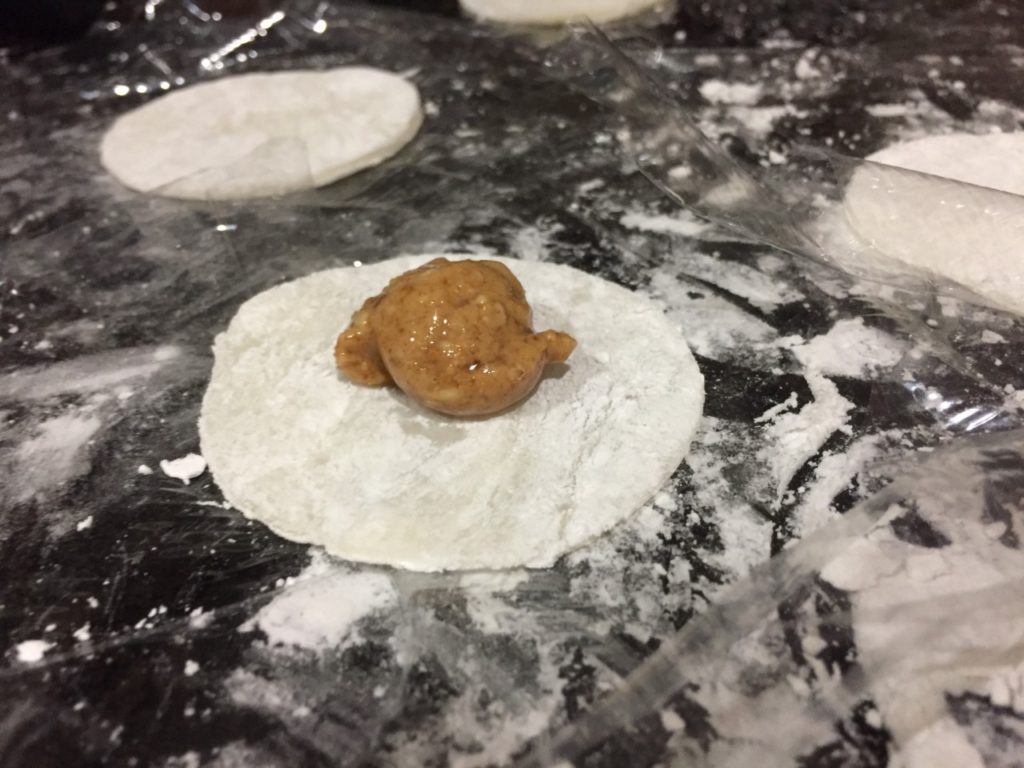
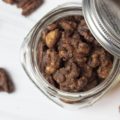
For another easy and delicious option, try peanut mochi. Take peanut butter and stuff it into the center of your mochi. If you’re willing to tackle a little mess, I like to use freshly ground honey roasted peanut butter. But if you prefer something that’s easier to mold and shape, add some confectioners sugar to your peanut butter. This will help absorb some of the oil and give the added benefit of some extra sweetness to your filling.
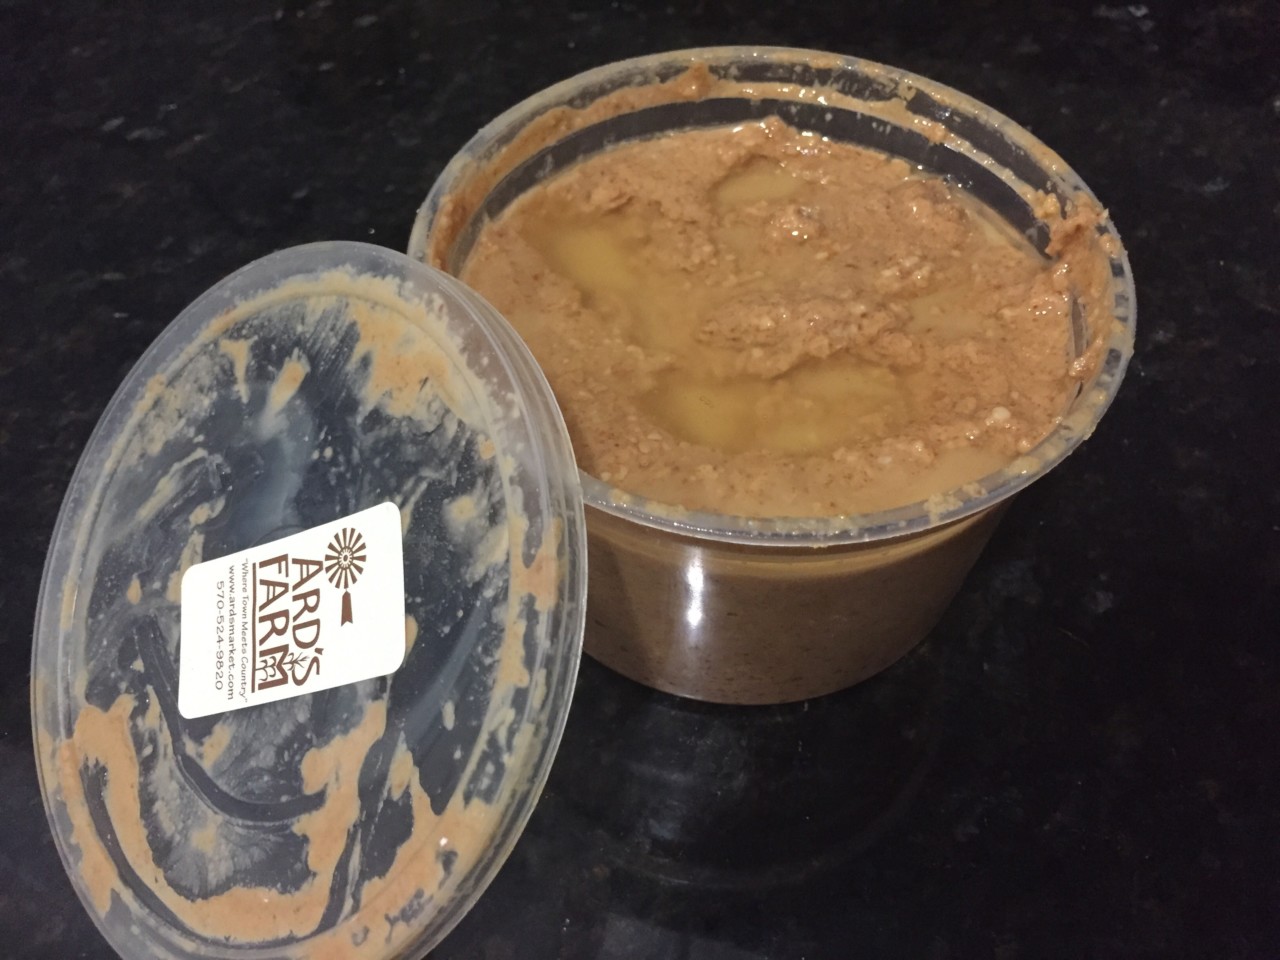
The peanut butter I used here is actually from Ard’s Farm, a local farm store in Pennsylvania near where I went to school. But don’t worry, if that’s not local to you, you can find natural peanut butter at most grocery stores these days. If I haven’t been to Pennsylvania in a while, Whole Foods usually delivers for me. But even your more traditional skippy or jif will work fine.
secrets to success;
- Be prepared to get messy! We’re talking about a sticky, sticky dough with fresh ingredients inside, whether that’s strawberries or peanut filling. It’s gonna get messy. Coat your hands with cornstarch and keep the bag around because you will be going back for more. Don’t be shy about adding more cornstarch if you need to keep things from sticking. “Flour” everything–your hands, the table, your rolling pin (if using).
- Fresh strawberries are delectable, bright, and delicious in these mochi. But strawberries have moisture and moisture can make your mochi wilt and melt. So serve these strawberry mochi fresh!
- If you need a longer shelf life out of your mochi, use your freezer. Pop them in the freezer to prevent melting. Plus, they’re great straight from the freezer for a cold treat. Biting into a mochi that’s just started thawing is such a delicious texture.
Looking for other asian dishes to try? Check out these scrumptious options:
- Chili crisp udon noodles make for a delicious easy weeknight meal with a little kick!
- For a handheld, savory treat, try these japanese curry bread (カレーパン).
- If you haven’t heard of it, hiroshima okonomiyaki is the most delicious savory pancake you’ve ever tried!

strawberry mochi;
Ingredients
mochi dough;
- ¾ cup glutinous rice flour (also known as sweet rice flour)
- ¾ cup water
- ¼ cup sugar
- cornstarch for rolling and flouring
fillings;
- ½ cup fresh strawberries diced into small pieces
- 3 Tbsp natural peanut butter (optional, as a second filling)
Instructions
- In a microwave-safe bowl, combine the ¾ cup glutinous rice flour, ¼ cup sugar, and ¾ cup water. Whisk together until combined.
- Microwave the bowl on high for 1 minute. Remove, and use a spatula to mix together. Lumps are expected. Return to the microwave and heat another 30 seconds. Remove and stir. Return to the microwave for 15-30 second increments until all liquid becomes a sticky dough.
- Ensure the dough is cool enough to handle before proceeding. Sprinkle your board generously with cornstarch, and roll out to about ¼" thickness. Cut out roughly 2" circles.
- Add roughly ½ tsp filling to the center of your mochi dough circle. Fold it up and press together the seams. Set aside and repeat for all remaining filling and dough.
- Serve the mochi fresh. Because of the moisture in the strawberries they will not keep. If desire to make them ahead or keep for more than 8 hours, store them in the freezer and thaw before serving.


3 Comments
cookie dough ice cream mochi; | Best With Chocolate
July 26, 2023 at 4:20 am
[…] flour to hold together a soft and sticky dough that usually surrounds some delicious filling like fresh strawberries, red bean paste, or peanut filling–or in this case, ice […]
chocolate lattice strawberry pie; | Best With Chocolate
August 11, 2023 at 8:02 am
[…] fresh strawberry-mochi; […]
red heart cake cookies; | Best With Chocolate
February 8, 2025 at 9:01 am
[…] strawberry mochi; […]